

Learn how to paint a barn quilt on a thrifted tray for a beautiful art piece in your home. Step by step DIY tutorial using Chalk Paint.

Think about you, quilting. Pair that image with your wildest, most wouldn’t-it-be-amazing dream. What does your marvel of a quilting experience look like? For astronaut Karen Nyberg, her quilting adventure was a literal out-of-this world event: making a quilt block in orbit, on the International Space Station. Wow! Inspiration doesn’t come on a scale much …

A few years ago I painted a barn quilt and a mini barn quilt with friends. It is really a lot of fun, and now you can make your own!

You see the barn quilts, but do you know the barn quilt meanings? Barn quilt patterns are large, colorful, geometric designs painted on the sides of barns or other structures. These patterns have gained popularity as a form of rural art and storytelling.
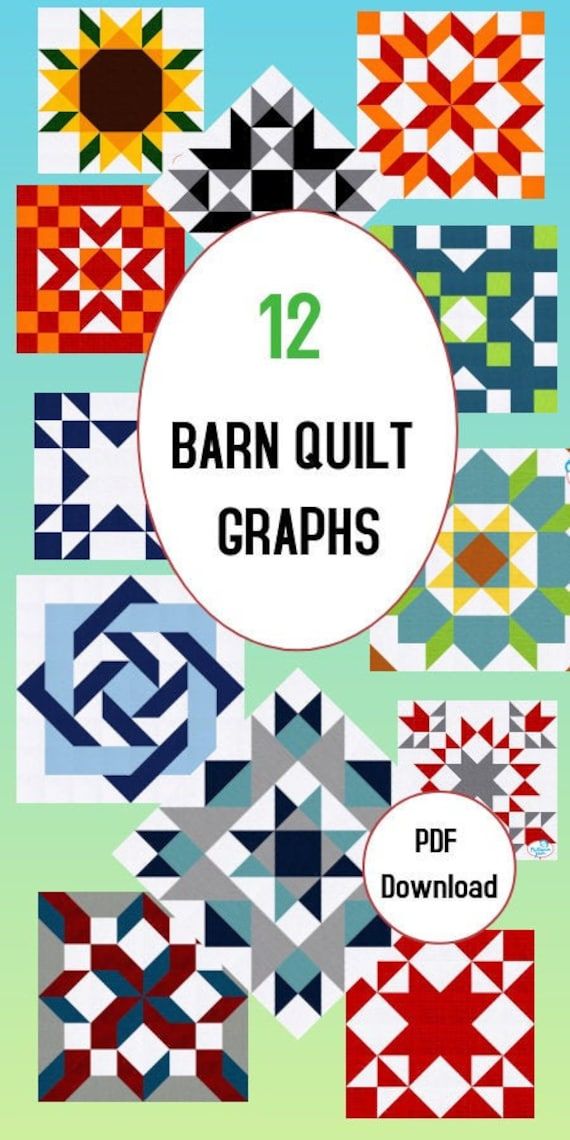
This listing is for a pdf download of 12 (plus one to make 13) full color graphs of Barn Quilts. ***This is not the finished wood barn quilt itself product.*** You would use the graphs as a guide to mark your design (usually with a straight edge and pencil after you prime your wood.) Example: You have a 24" square piece of wood that has been primed.. So say the graph is 8 squares across and down. Each square in this case would represent 3" (to equal 24") . If you want it bigger or smaller...each square could represent 2" or 4"...etc. (It's just like quilting...but with wood.) Colors can also easily be changed. Knowledge of making wood barn quilts is recommended as no painting or other directions are included. These are the PDF color graphs only.

Quilters love their quilts...so much so that they will show them off anyway they can! They look great over a couch or the foot of a bed....on a wall and even to decorate the outside of your home. I'm not talking about hanging a fabric quilt outside...I'm talking about a barn quilt! A barn quilt is basically a large piece of wood that is painted to look like a large quilt block. We have a long history in our country of hanging barn quilts outside our homes and barns. They were thought to bring good luck and prosperity. Some 200 years ago when there wasn't enough paint to paint an entire barn women would take a pattern of a quilt block that grandma had made and would paint barn quilt to hang on their barns. It was a way to decorate their farms and also was a source of family pride. Once paint was readily available and people began painting their entire barns, quilt block kind of disappeared. In 2000 a woman in Ohio wanted to increase tourism in her state and started a barn quilt tour…much like our local Parade of Homes. People would tour the farms in the state and view the barn quilts painted to represent the families who owned them. Last summer our family toured the east coast and mid-west and I fell in love with these barn quilts. So much so that I had to come home and make one...and I haven't stopped! They are super easy to make and are pretty addicting. I find myself looking for new patterns to paint and ways to use them all. The first thing you need to find is a surface to paint on. Some people paint of solid wood, but I love making my own boards because they look more like the wall of a barn. So, here are the instructions for making a barn board. Materials Fence boards 6' x 6" Wood Glue 1" Sheetrock Screws Drill Saw Sandpaper Eye Goggles Pencil and Tape Measure The first thing you need to find is a surface to paint on. Some people paint of solid wood, but I love making my own boards because they look more like the wall of a barn. So, here are the instructions for making a barn board. 1. Decide the size of the barn board you want to make. 2. Purchase enough fence boards to make the size you want. 22" x 22" - 2 Six Foot Boards 33" x 33" - 7 Six Foot Boards 44" x 44" - 9 Six Foot Boards I purchase my boards at a big box store such as Home Depot or Lowes. If you do not have a saw at home, they will make the cuts for you there. Just look for a kind employee and have them cut the boards to the size you need. Once they are cut it is good to let them cure a little. Fence boards typically come with some moisture in them. So, it's good to lay them flat at room temperature before you go onto the next steps. Otherwise, you will have gaps in your board surface. (Some people like the larger gaps...but if you want tight seams, cure your boards!) 3. Once the boards are cut, lightly sand the edges to smooth off any rough spots and to "age" the boards. 4. Lay out your boards together, face down. Make the seams as tight as you want them. You need to cut two extra lengths to use as your back braces. These amounts were included in the number of boards you needed to purchase ...so you should have enough ready to cut. 5. Squirt a bead of wood glue across the back brace and lay down on the back of the boards flush with the top and the bottom edges. 6. Using the 1" drywall screws, screw through the back brace into the the barn boards to attach it all together. 7. Now your board is ready to prep for paint. If you want to paint on the raw wood...go for it! I have made a few on natural and stained wood and they look great. Although, the design is a little fainter on natural wood than on a painted surface. So what you do depends on the design you want. If you want your colors to show up bold, use a flat or a semi-gloss paint and coat the top of the barn board. I like to use a dry brush for this and as little paint as possible repeating as many strokes as I need to get the desired coverage. It is nice to have some raw wood coming through if you are looking for a more antique look. How To Paint A Barn Quilt Materials Base Paint Pencil Long Strait Edge or Ruler Eraser Chip Brush Foam Brush Acrylic Paint Frog Tape Wood Stain Two Dry Rags Paint Thinner Polyurethane Spray Rubber Gloves 1. The first step after you have your board made and prepped is to lay out your pattern. Almost all quilt blocks are made up of smaller squares like in the Star Spangled Barn Quilt pattern pictured above. This pattern has four small blocks across and four up and down. The best way to get perfectly square blocks is to measure the size of your board and divide that measurement by the number of blocks to get how big to make your blocks. Once you have your grid lines marked on your board, using a pencil and strait edge, draw in the lines of your pattern and in pencil, make a notation of what color goes in each section. I have to do this for my sanity so I don't make a mistake and have to repaint something. 2. Now that everything on the board is drawn out, tape off the sections you want to paint first with painters tape. The absolute best tape for this is Frog Tape. You can find it at most hardware store and paint sections. I have tried every tape out there and the only one that sticks down to these uneven surfaces with the least amount of seepage is Frog Tape. It is worth every cent! If you are using a bold or dark color you will want to paint two or three coats. You can peel the tape off as soon as you are finished. It doesn't need to dry completely. That's one of the other benefits to using Frog Tape. 3. After your barn quilt is painted and dry, use an eraser to remove any pencil lines that are still showing. I love to finish off the boards with an antique look. To get a pretty finish, take one part stain to one part of paint thinner. Wear rubber gloves and dip a soft rag into the mixture. Wipe it on in a small area and then wipe off with the other dry rag. Repeat until your board is covered and you have the darkness you like. This technique deepens the colors of the paint and ages the base color. 4. If you are going to hang your barn quilt outside, you will want to spray two coats of polyurethane spray. This will protect the wood and the colors from sun, rain and other elements. If you are going to hang it inside you can skip this step. So there you have it...this is how you make a barn quilt! I hope you enjoy making these as much as I have. Just be warned...they are addicting. I have one hung over my garage, one on my front porch and one on my back patio. I also like to use them for serving trays on my kitchen and dinning room tables. They look great hung on any wall where you are wanting a big bold burst of color with major impact. The only thing I need now is a big barn!!! Maybe Santa will bring one this year.... If you have any questions, please shoot me an email and I will be happy to help you. Have a great day! Share:facebook - twitter - pinterest How To Make A Barn Quilt

I’ve been planning to make a barn quilt since we first took down the old barn to rebuild on our property (in 2012). What can I say? It takes a long time to see some of my plans come to fruition. But oh … I think it was worth the wait. Come ON? I’m doing a happy […]

Add new pattern designs to your quilted projects! Check out these 27 inspiring barn quilt patterns and start creating your own version now.

If you have seen barn quilts and wondered the barn quilt meaning, we have the stories behind them and how to make your very own barn quilt.

Some traditional quilt block designs that I'm looking at using for some new ideas...

A few years ago I painted a barn quilt and a mini barn quilt with friends. It is really a lot of fun, and now you can make your own!

**This is not the finished wood barn quilt itself product.*** Pattern Only! For more Patterns, visit etsy.com/shop/ELBQPatternsHQ These are paper patterns, please pick the size barn quilt you would like to make and we will ship you the paper pattern. They will come folded and will be the size you order. These will only be able to be used in the size you order. Draw your pattern without elaborate grids, calculations, or rulers. Your pattern will be drawn on plain white paper, the exact size that you need. There will also be instructions included on what supplies you need, how to transfer the pattern along with how to paint. -How to transfer the design to your board- Dry iron out the folds and place you paper template over your board for transfer. Graphite paper (included) is a great technique to use to transfer the design to your board. Or, you can use a charcoal pencil (#2 pencil included) rubbed on the back, over the lines. Using a straight edge and light pencil marking, trace over the lines of the pattern with your transfer paper underneath. These patters are computer generated and drawn, so sometime the lines are not perfectly lined up. Don’t worry it is fixable, when you trace it out using a ruler make the line straight when you draw it and the line will be straight on your board.

There’s something magical about quilts. Perhaps it’s the creative process of selecting color combinations, arranging the blocks to create an...

The original source for high-quality, precision printed paper barn quilt patterns since 2020. Be ready to tape and paint your Barn Quilt in record time. Draw your pattern without elaborate grids, calculations, rulers and protractors. Your pattern will be reproduced on plain white paper, the exact size that you need. It will be folded, and mailed as a flat. This is a physical product. This is NOT a digital download. WE print the pattern onto a large single sheet of pattern paper so you don't have to. -How to transfer the design to your board- Dry iron out the folds and place you paper template over your board for transfer. Graphite paper (not included) is a great technique to use to transfer the design to your board. Or, you can use a charcoal pencil rubbed on the back, over the lines. Using a straight edge and light pencil marking, trace over the lines of the pattern with your transfer paper underneath. This process works best on MDO or sanded plywood with several coats of primer. -Additional info- All patterns will be drawn out in pen to give a sharp line to trace on. Contact us for custom patterns if the one you want is not listed here. Contact us if you need a specific size. For example if your board is not an exact size listed here. Make sure to check out the Will County Barn Quilt Trail. www.willcountybarnquilts.com/

Aprender a coser, bordar y tejer en Valencia con los talleres continuos en la escuela de labores The Crafty Room de la mano de María Peiró Esteban

Hope of Hertfordshire 90" x 90" 12" Finished Block 9" Finished Border See the free quilt pattern below. Here's a st...

Interwoven Bigger Quilt Pattern was a find, actually a great find he free here at this site I found it https://patternjam.com, and actually I was after this

The block's size is 30 centimetres, like the previous ones. I would have liked to add more versions, but Inkscape isn't working as it should and I don't really know how to fix it :( Hopefully I'll still be able to make and post new patterns, but if it goes really quiet here for a while, you'll know why ;) Anyway, please click any image to enlarge and have fun :) Quilt block 7 Quilt block 7,blank Possible order of assembly Quilt top version Quilt top version, blocks on point Template for English paper piecing Print page twice for one block Template for cutting fabric with 5mm seam allowance

Easily make a beautiful Cleopatra Fan quilt using this free quilt pattern by quilting expert - Jennifer Strauser. The project measures 88 inches square.
