

Stained or wrong-size old tablecloths aren't doing you any good at the back of the linen closet. Here's how to put this material to good use around the house.

A couple of years ago, right before we left California to move to Virginia, I went to visit my sister-in-law. One of the passions that we share is quilting. As much as she loves to

I must be feeling very generous today, because I'm here to give you two fabulous tips...all in ONE blog post. A two for one deal, and ...
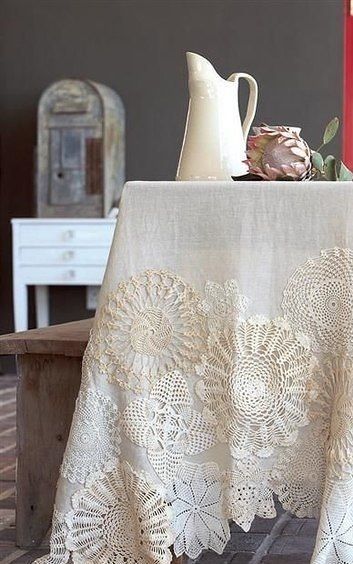
Do you have some doily’s that your grandma made? Why not display them or make them into something useful. Doily’s can be made into accessories, art, or home decor. With these DIY Doily Craft Ideas that I found are a great way to inspire you to create something with all those Doily you have sitting

◎Please note!!! We measure tablecloths in inches and centimetres. Please measure your table in these two units!!! As the tablecloth is a custom product, please accurately measure the size of your table. If you are not sure please contact us and we will be happy to help. ◎Custom size available. Please contact us! We sell the original fabric, you can buy the original fabric to make bags, pillow, clothes, etc. ◎DETAILS -Materials:Blended fabric (Cotton, Linen, Polyester) -Type:Square, Rectangle ▲ It will shrink by 4% after washing. -Size: 35x35"(90x90cm) 39x55"(100x140cm) 47x47"(120x120cm) 55x55"(140x140cm) 43x67"(110x170cm) 55x71"(140x180cm) 55x79"(140x200cm) 55x87"(140x220cm) 55x94"(140x240cm) This is a decorative tablecloth. The tablecloth protects the table and can decorate your space. The table can not be changed often, but the tablecloth can, you can follow your mood, change a different tablecloth. If you're still looking for a gift, check out our fabric! This tablecloth is a great gift for any holiday, mother's Day, Father's Day, Valentine's Day, wedding, honeymoon, birthday, anniversary, Halloween, Christmas or any other occasion to show your love to her/him. Even if it's not a gift, it's perfect for indoors or outdoors. It can be used in your kitchen, dining room, garden, patio, balcony, camping and picnic, or even as a dust cover to protect your favorite Musical Instruments and other items. ◎TAKING CARE -Washing not recommended. (The shock of cleaning may dislodge the tassel) We recommend wiping with a damp cloth and letting it air dry. If you must wash, wash gently by hand. ◎INSTRUCTIONS -Because this product is handmade the colour and detail may vary. -Because this product is affected by the lighting environment, the color may vary. -We will carefully package and protect the product so that it can be safely delivered to you. ▲ Order shipping time, normally it takes 10 - 20 day. ▲ Please leave your PHONE NUMBER in the "note to seller" to make sure the carrier can contact you during delivery.. ◎IF you have any question PLEASE free to contact me.❤ ============================================= For more decorations items pls visit our shop: https://www.etsy.com/shop/PointLine Thanks for stopping by!

This top would have been my contribution to The Refashioners 2020 which has unfortunately but understandably been cancelled this year. I had already completed my project and wanted to share it with you all as (despite not being the most dramatic refashion ever) it really pushed me outside my sewing comfort zone and I'm hoping it might inspire some of you to give it a try too! Portia's yearly refashioning challenge started back in 2011 and carries an important message, encouraging sewers to look at fabric and clothing in a new light. I try to make careful choices when it comes to the fabric I use and how it has been produced. Despite turning away from fast fashion and making my own clothes I am aware that my fabric consumption has its own impact on the environment. One of the best ways to care for our planet and sew sustainably is to reuse and repurpose textiles which already exist. The theme for this year's challenge was planned to be 'use what you have' which felt a little more accessible to me as a newbie refashioner as you can use household items with large flat surface areas of fabric like bedding, curtains and tableware. I was still really daunted by this challenge. I've always thought I that the transformation challenge on The Great British Sewing Bee would be my downfall. When I cook I'm not the kind of cook who throws things in to a pan on instinct...I like a recipe! My creative brain just does not seem to think in that way. So I eased in to my first refashion by using a tablecloth. Despite being a flat piece of fabric I really tried my best to make the most of what the table cloth gave me; right down to using one of the loops of edge stitching as the loop for my button at the centre back neckline. In the spirit of 'use what you have' the covered button I had stashed away, salvaged from an old RTW top. When I moved to Dorking last summer I had a huge sort out and only brought with me things I thought I really needed so I didn't have any spare textiles asking to be refashioned. Instead I turned to eBay as my source of unwanted textiles. I've long been a fan and follower of the work of embroidery artists on Instagram like Tessa Perlow who embroiders on to existing garments to transform them into unique worn works of art. However, I've never been able to find the time or patience to do this kind of work myself. This project is sort of a cheats way of achieving a hand embroidered top, by using an already embroidered textile! I chose this tablecloth because I fell in love with the embroidery. I haven't found a single flaw in the beautiful symmetrical handwork. I felt kind of awful cutting in to it but focused on the fact that all that work is being appreciated and given another life. I loved the colours of it and that it was quite big and bold, plus the embroidered green border added another element to play with. But what really sold it to me was how the embroidery was arranged in clear quarter and semi-circular sections. I enjoyed figuring out how to place those to their best advantage on the top and use as much of the embroidery as possible. I'm really pleased with how it turned out. I think my favourite part is the back with those big arcs of floral embroidery meeting in the middle. I made the refashioning project feel a little more manageable to me by starting with a pattern rather than diving straight in to draping or cutting something from scratch. Baby steps! However, I did fully flex my pattern hacking muscles to make the design of the top much closer to my inspiration. Pinterest is still one of my favourite ways to collect inspiration for my sewing projects and over the last year or so I've pinned numerous boxy little tops with interesting details and style lines. The simplicity of the example below really grabbed me. I considered using the free tank tutorial from Fabrics-Store.com (they have a tonne of great resources, patterns and tutorials on their website FYI) but ultimately decided I did want a bit of shaping in the bust. I was torn between the Afternoon Lyra Tank and the Ashton Top from Helen's Closet. I ended up plumping for the Ashton because it seemed to have a lot of mileage in it with options for an all in one facing or bias faced neckline and all sorts of hacks popping up online. When I'm splashing out on a pattern I like to think I'm going to use it multiple times. I'm really pleased with my choice as I think the shaping and fit is great but I'll discuss the pattern more in depth in a future post as I have another hacked version of it to share with you! For reference I cut the size 6 B cup. To start with I extended the length of the shoulder seam a little to match the squarer shape of the inspiration garment. Then I drew a line straight down from the outer edge of the shoulder to the hem on both the front and back pattern pieces. I cut down these lines and attached the pieces I'd cut off the front and back together to create my new side panel pattern piece (after folding the bust dart out of the front piece and remembering to add seam allowances where necessary). I straightened off the top edge of the side panel and shortened it by 3" to create the stepped hem. I found this to be about as much as you would want to remove before you start seeing flesh above the waistband of a high waisted pair of trousers or skirt. The final thing I needed to do was to cut a strip of linen to fill in the centre back which I wanted to cut two separate panels for to make the most of the beautiful embroidered detail along the edges of the table cloth. I hemmed the top and bottom of this little infill, overlocked the long raw edges then topstitched it in place between the panels 3" up from the hem again. The infill finishes about 5" down from the neckline creating a sort of keyhole opening which fastens with a button at the nape. I'm really enjoying the combination of the modern cut of the top constructed with the more traditional embroidery. The weighty beautiful vintage linen turned out perfect for this style of top as it holds the structure nicely. I did have some scraps of white linen left over from my Wrap Top to use for the centre back and side panels but I actually only used it for the bias facing in the end. I'm so proud of myself for embracing this creative challenge and can't thank Portia enough for encouraging me to try something a little different. It has really pushed my creativity and construction knowledge and proved that I can do more than I think with my sewing. I'll definitely be looking at textiles differently in future and will make an effort to incorporate more refashioning into my sewing practice. I even feel like I might have the confidence to move on to something a little more challenging next time!

Learn how to use vintage lace in a sustainable sewing project! Hey y’all, today I’m channeling grandma’s house in my outfit with this tablecloth I turned into a skirt. Every time I go antique shopping, I see lace tablecloths. And I love lace, but lace tablecloths in interior design aren’t really my thing (nor would...Read More

These gorgeous projects made with towels are easy, fun, and a great way to recycle material. Take a look at these creative ideas!

We had a lovely Christmas Day, with perfect weather, yummy food and family with us. We also spent time with good friends, so a rather busy day. My friend Lou and I do a little Christmas gift swap each year. She really spoiled us this time. A beautiful cross stitch, zippy pouch, hand cream, NZ choccies, some fun coffee fat quarters, an advent calendar for next year, a tulip pin cushion with suction cap to pop on your sewing machine and two little pins. So much loveliness. The little pins may not mean much to most people, but are rather special Queen's Pier is a Victorian pier in Ramsey, Lou's home town and it is undergoing some much needed restoration. These are a nice little treat. I sent off a couple of covered coat hangers. Funnily enough, Lou had thought of a similar gift. Santa brought me this box of biscuits. Well, Santa may have brought me a really cute tin to store my Christmas projects in, that just happens to have some biscuits inside. I'm sure they won't go to waste (maybe they will go to my waist!!??). Boxing Day is the day where we look forward to watching the Boxing Day Test cricket and eating nothing but lots of leftovers. Trifle features prominently. I did make a slight detour into my sewing room and made something I have been scheming on for several years. I knew I had blogged about it at the time. Yes, I saw a table cloth made from tea towels at the CWA stall at the Australia Day event, way back in 2010! Since we purchased a rather large outdoor setting when we moved into this house, nearly five years ago, each summer I keep saying I should make one. I have a little stash of souvenir tea towels, but Mum has quite a large stack that she has collected on her travels and never used. I sorted through them and selected fourteen that were of places within Australia that Mick and I have visited. I also chose only linen tea towels. Once I consolidated my tea towels with Mum's the tub is brim full again. I wasn't sure how to hem the table cloth along the bottom of the tea towels, as they vary slightly in length, and in the end left them as they were, as they show a lot have information on where they were made or printed on them, which is interesting. I saw a few versions on Pinterest and had a little chuckle when one made a plastic cover to protect the cloth. My opinion is that you wouldn't be able to get anything more washable, as being tea towels, are designed to be laundered often. Anyway, it was a fun, simple make and should create a little bit of interest when we sit down to our next barbecue with friends. Oh, and it is a finish for OPAM for December. Mick, meanwhile, had an excursion to the shops and bought himself an electric motor for his kayak. Merry Christmas! His shoulder is jiggered and last time he went for a paddle it just caused a lot of pain and was not at all pleasurable. This should make it more fun for him. Yesterday we had a day trip to Carcoar Dam, where my brother was camping with friends. It is a relatively small dam, but rather scenic, with the wind farm in the background. We looked down on this area from Mount Macquarie on one of our recent Friday Funday outings. There is free camping and we were surprised that there weren't more people camped there. It was a good opportunity to try out the new motor. The three fellows headed off in their kayaks, while us girls stitched and chatted. Their campsite was under some big shady trees, so it was a very pleasant way to spend the afternoon. I had quickly traced a stitchery for another Christmas ornament and was very happy to actually finish it while we were out there. Now my problem is that I can't find my favourite pattern with the template for the felt backing. I was obviously slack and didn't put it away properly when I made one during the year. I'm sure it will turn up. Maybe this is the kick in the butt I need to get in and give my sewing room a big tidy up. Once we returned home it was time to start the big job of putting Christmas away. We don't wait till after New Year or for Twelfth Night, but prefer to get everything packed away before it becomes too stale. A big job, but I'm glad it is done. Today has also been rather lazy. Each year I make a great long list of things I want to do during the break before we return to work after New Year. Each year I barely scratch the surface. You would think I'd learn, wouldn't you. No worries, I won't beat myself up about it. I have not stitched a stitch towards my December goals, other than the Santa. Not only that, I am now looking at a new project starting in January. Yes, another stitch along. Rhonda Dort is hosting a stitch along to make a quilt using vintage doileys, something I have wanted to do for ages. You can start to read her posts about it here. She also has a facebook group for it 1914 Boehm House Vintage Linens Retreat. The official start date is 1 January 2021, but we have been given instructions on how to launder our vintage linens. I have several in soaking as we speak. I hope they come out nice and fresh. It will be hard to cut into them, but they are not precious family ones, so that will help. So that's where we are up to now. Mick goes to work tomorrow for the next few days, so I think I will settle myself into the sewing room and stitch "something". I know that most of my goals will go unmet, but as I always say, this is to be fun, not a chore.

Make your own homemade tablecloth using acrylic paint, a stencil and a painter's drop cloth. Great Thanksgiving decoration or any Holiday celebration!

This top would have been my contribution to The Refashioners 2020 which has unfortunately but understandably been cancelled this year. I had already completed my project and wanted to share it with you all as (despite not being the most dramatic refashion ever) it really pushed me outside my sewing comfort zone and I'm hoping it might inspire some of you to give it a try too! Portia's yearly refashioning challenge started back in 2011 and carries an important message, encouraging sewers to look at fabric and clothing in a new light. I try to make careful choices when it comes to the fabric I use and how it has been produced. Despite turning away from fast fashion and making my own clothes I am aware that my fabric consumption has its own impact on the environment. One of the best ways to care for our planet and sew sustainably is to reuse and repurpose textiles which already exist. The theme for this year's challenge was planned to be 'use what you have' which felt a little more accessible to me as a newbie refashioner as you can use household items with large flat surface areas of fabric like bedding, curtains and tableware. I was still really daunted by this challenge. I've always thought I that the transformation challenge on The Great British Sewing Bee would be my downfall. When I cook I'm not the kind of cook who throws things in to a pan on instinct...I like a recipe! My creative brain just does not seem to think in that way. So I eased in to my first refashion by using a tablecloth. Despite being a flat piece of fabric I really tried my best to make the most of what the table cloth gave me; right down to using one of the loops of edge stitching as the loop for my button at the centre back neckline. In the spirit of 'use what you have' the covered button I had stashed away, salvaged from an old RTW top. When I moved to Dorking last summer I had a huge sort out and only brought with me things I thought I really needed so I didn't have any spare textiles asking to be refashioned. Instead I turned to eBay as my source of unwanted textiles. I've long been a fan and follower of the work of embroidery artists on Instagram like Tessa Perlow who embroiders on to existing garments to transform them into unique worn works of art. However, I've never been able to find the time or patience to do this kind of work myself. This project is sort of a cheats way of achieving a hand embroidered top, by using an already embroidered textile! I chose this tablecloth because I fell in love with the embroidery. I haven't found a single flaw in the beautiful symmetrical handwork. I felt kind of awful cutting in to it but focused on the fact that all that work is being appreciated and given another life. I loved the colours of it and that it was quite big and bold, plus the embroidered green border added another element to play with. But what really sold it to me was how the embroidery was arranged in clear quarter and semi-circular sections. I enjoyed figuring out how to place those to their best advantage on the top and use as much of the embroidery as possible. I'm really pleased with how it turned out. I think my favourite part is the back with those big arcs of floral embroidery meeting in the middle. I made the refashioning project feel a little more manageable to me by starting with a pattern rather than diving straight in to draping or cutting something from scratch. Baby steps! However, I did fully flex my pattern hacking muscles to make the design of the top much closer to my inspiration. Pinterest is still one of my favourite ways to collect inspiration for my sewing projects and over the last year or so I've pinned numerous boxy little tops with interesting details and style lines. The simplicity of the example below really grabbed me. I considered using the free tank tutorial from Fabrics-Store.com (they have a tonne of great resources, patterns and tutorials on their website FYI) but ultimately decided I did want a bit of shaping in the bust. I was torn between the Afternoon Lyra Tank and the Ashton Top from Helen's Closet. I ended up plumping for the Ashton because it seemed to have a lot of mileage in it with options for an all in one facing or bias faced neckline and all sorts of hacks popping up online. When I'm splashing out on a pattern I like to think I'm going to use it multiple times. I'm really pleased with my choice as I think the shaping and fit is great but I'll discuss the pattern more in depth in a future post as I have another hacked version of it to share with you! For reference I cut the size 6 B cup. To start with I extended the length of the shoulder seam a little to match the squarer shape of the inspiration garment. Then I drew a line straight down from the outer edge of the shoulder to the hem on both the front and back pattern pieces. I cut down these lines and attached the pieces I'd cut off the front and back together to create my new side panel pattern piece (after folding the bust dart out of the front piece and remembering to add seam allowances where necessary). I straightened off the top edge of the side panel and shortened it by 3" to create the stepped hem. I found this to be about as much as you would want to remove before you start seeing flesh above the waistband of a high waisted pair of trousers or skirt. The final thing I needed to do was to cut a strip of linen to fill in the centre back which I wanted to cut two separate panels for to make the most of the beautiful embroidered detail along the edges of the table cloth. I hemmed the top and bottom of this little infill, overlocked the long raw edges then topstitched it in place between the panels 3" up from the hem again. The infill finishes about 5" down from the neckline creating a sort of keyhole opening which fastens with a button at the nape. I'm really enjoying the combination of the modern cut of the top constructed with the more traditional embroidery. The weighty beautiful vintage linen turned out perfect for this style of top as it holds the structure nicely. I did have some scraps of white linen left over from my Wrap Top to use for the centre back and side panels but I actually only used it for the bias facing in the end. I'm so proud of myself for embracing this creative challenge and can't thank Portia enough for encouraging me to try something a little different. It has really pushed my creativity and construction knowledge and proved that I can do more than I think with my sewing. I'll definitely be looking at textiles differently in future and will make an effort to incorporate more refashioning into my sewing practice. I even feel like I might have the confidence to move on to something a little more challenging next time!

how to sew a tablecloth dress from vintage linens with pattern M8108. If you like upcycled clothing, sustainable kitch, and repurposed fashion,

This top would have been my contribution to The Refashioners 2020 which has unfortunately but understandably been cancelled this year. I had already completed my project and wanted to share it with you all as (despite not being the most dramatic refashion ever) it really pushed me outside my sewing comfort zone and I'm hoping it might inspire some of you to give it a try too! Portia's yearly refashioning challenge started back in 2011 and carries an important message, encouraging sewers to look at fabric and clothing in a new light. I try to make careful choices when it comes to the fabric I use and how it has been produced. Despite turning away from fast fashion and making my own clothes I am aware that my fabric consumption has its own impact on the environment. One of the best ways to care for our planet and sew sustainably is to reuse and repurpose textiles which already exist. The theme for this year's challenge was planned to be 'use what you have' which felt a little more accessible to me as a newbie refashioner as you can use household items with large flat surface areas of fabric like bedding, curtains and tableware. I was still really daunted by this challenge. I've always thought I that the transformation challenge on The Great British Sewing Bee would be my downfall. When I cook I'm not the kind of cook who throws things in to a pan on instinct...I like a recipe! My creative brain just does not seem to think in that way. So I eased in to my first refashion by using a tablecloth. Despite being a flat piece of fabric I really tried my best to make the most of what the table cloth gave me; right down to using one of the loops of edge stitching as the loop for my button at the centre back neckline. In the spirit of 'use what you have' the covered button I had stashed away, salvaged from an old RTW top. When I moved to Dorking last summer I had a huge sort out and only brought with me things I thought I really needed so I didn't have any spare textiles asking to be refashioned. Instead I turned to eBay as my source of unwanted textiles. I've long been a fan and follower of the work of embroidery artists on Instagram like Tessa Perlow who embroiders on to existing garments to transform them into unique worn works of art. However, I've never been able to find the time or patience to do this kind of work myself. This project is sort of a cheats way of achieving a hand embroidered top, by using an already embroidered textile! I chose this tablecloth because I fell in love with the embroidery. I haven't found a single flaw in the beautiful symmetrical handwork. I felt kind of awful cutting in to it but focused on the fact that all that work is being appreciated and given another life. I loved the colours of it and that it was quite big and bold, plus the embroidered green border added another element to play with. But what really sold it to me was how the embroidery was arranged in clear quarter and semi-circular sections. I enjoyed figuring out how to place those to their best advantage on the top and use as much of the embroidery as possible. I'm really pleased with how it turned out. I think my favourite part is the back with those big arcs of floral embroidery meeting in the middle. I made the refashioning project feel a little more manageable to me by starting with a pattern rather than diving straight in to draping or cutting something from scratch. Baby steps! However, I did fully flex my pattern hacking muscles to make the design of the top much closer to my inspiration. Pinterest is still one of my favourite ways to collect inspiration for my sewing projects and over the last year or so I've pinned numerous boxy little tops with interesting details and style lines. The simplicity of the example below really grabbed me. I considered using the free tank tutorial from Fabrics-Store.com (they have a tonne of great resources, patterns and tutorials on their website FYI) but ultimately decided I did want a bit of shaping in the bust. I was torn between the Afternoon Lyra Tank and the Ashton Top from Helen's Closet. I ended up plumping for the Ashton because it seemed to have a lot of mileage in it with options for an all in one facing or bias faced neckline and all sorts of hacks popping up online. When I'm splashing out on a pattern I like to think I'm going to use it multiple times. I'm really pleased with my choice as I think the shaping and fit is great but I'll discuss the pattern more in depth in a future post as I have another hacked version of it to share with you! For reference I cut the size 6 B cup. To start with I extended the length of the shoulder seam a little to match the squarer shape of the inspiration garment. Then I drew a line straight down from the outer edge of the shoulder to the hem on both the front and back pattern pieces. I cut down these lines and attached the pieces I'd cut off the front and back together to create my new side panel pattern piece (after folding the bust dart out of the front piece and remembering to add seam allowances where necessary). I straightened off the top edge of the side panel and shortened it by 3" to create the stepped hem. I found this to be about as much as you would want to remove before you start seeing flesh above the waistband of a high waisted pair of trousers or skirt. The final thing I needed to do was to cut a strip of linen to fill in the centre back which I wanted to cut two separate panels for to make the most of the beautiful embroidered detail along the edges of the table cloth. I hemmed the top and bottom of this little infill, overlocked the long raw edges then topstitched it in place between the panels 3" up from the hem again. The infill finishes about 5" down from the neckline creating a sort of keyhole opening which fastens with a button at the nape. I'm really enjoying the combination of the modern cut of the top constructed with the more traditional embroidery. The weighty beautiful vintage linen turned out perfect for this style of top as it holds the structure nicely. I did have some scraps of white linen left over from my Wrap Top to use for the centre back and side panels but I actually only used it for the bias facing in the end. I'm so proud of myself for embracing this creative challenge and can't thank Portia enough for encouraging me to try something a little different. It has really pushed my creativity and construction knowledge and proved that I can do more than I think with my sewing. I'll definitely be looking at textiles differently in future and will make an effort to incorporate more refashioning into my sewing practice. I even feel like I might have the confidence to move on to something a little more challenging next time!

This top would have been my contribution to The Refashioners 2020 which has unfortunately but understandably been cancelled this year. I had already completed my project and wanted to share it with you all as (despite not being the most dramatic refashion ever) it really pushed me outside my sewing comfort zone and I'm hoping it might inspire some of you to give it a try too! Portia's yearly refashioning challenge started back in 2011 and carries an important message, encouraging sewers to look at fabric and clothing in a new light. I try to make careful choices when it comes to the fabric I use and how it has been produced. Despite turning away from fast fashion and making my own clothes I am aware that my fabric consumption has its own impact on the environment. One of the best ways to care for our planet and sew sustainably is to reuse and repurpose textiles which already exist. The theme for this year's challenge was planned to be 'use what you have' which felt a little more accessible to me as a newbie refashioner as you can use household items with large flat surface areas of fabric like bedding, curtains and tableware. I was still really daunted by this challenge. I've always thought I that the transformation challenge on The Great British Sewing Bee would be my downfall. When I cook I'm not the kind of cook who throws things in to a pan on instinct...I like a recipe! My creative brain just does not seem to think in that way. So I eased in to my first refashion by using a tablecloth. Despite being a flat piece of fabric I really tried my best to make the most of what the table cloth gave me; right down to using one of the loops of edge stitching as the loop for my button at the centre back neckline. In the spirit of 'use what you have' the covered button I had stashed away, salvaged from an old RTW top. When I moved to Dorking last summer I had a huge sort out and only brought with me things I thought I really needed so I didn't have any spare textiles asking to be refashioned. Instead I turned to eBay as my source of unwanted textiles. I've long been a fan and follower of the work of embroidery artists on Instagram like Tessa Perlow who embroiders on to existing garments to transform them into unique worn works of art. However, I've never been able to find the time or patience to do this kind of work myself. This project is sort of a cheats way of achieving a hand embroidered top, by using an already embroidered textile! I chose this tablecloth because I fell in love with the embroidery. I haven't found a single flaw in the beautiful symmetrical handwork. I felt kind of awful cutting in to it but focused on the fact that all that work is being appreciated and given another life. I loved the colours of it and that it was quite big and bold, plus the embroidered green border added another element to play with. But what really sold it to me was how the embroidery was arranged in clear quarter and semi-circular sections. I enjoyed figuring out how to place those to their best advantage on the top and use as much of the embroidery as possible. I'm really pleased with how it turned out. I think my favourite part is the back with those big arcs of floral embroidery meeting in the middle. I made the refashioning project feel a little more manageable to me by starting with a pattern rather than diving straight in to draping or cutting something from scratch. Baby steps! However, I did fully flex my pattern hacking muscles to make the design of the top much closer to my inspiration. Pinterest is still one of my favourite ways to collect inspiration for my sewing projects and over the last year or so I've pinned numerous boxy little tops with interesting details and style lines. The simplicity of the example below really grabbed me. I considered using the free tank tutorial from Fabrics-Store.com (they have a tonne of great resources, patterns and tutorials on their website FYI) but ultimately decided I did want a bit of shaping in the bust. I was torn between the Afternoon Lyra Tank and the Ashton Top from Helen's Closet. I ended up plumping for the Ashton because it seemed to have a lot of mileage in it with options for an all in one facing or bias faced neckline and all sorts of hacks popping up online. When I'm splashing out on a pattern I like to think I'm going to use it multiple times. I'm really pleased with my choice as I think the shaping and fit is great but I'll discuss the pattern more in depth in a future post as I have another hacked version of it to share with you! For reference I cut the size 6 B cup. To start with I extended the length of the shoulder seam a little to match the squarer shape of the inspiration garment. Then I drew a line straight down from the outer edge of the shoulder to the hem on both the front and back pattern pieces. I cut down these lines and attached the pieces I'd cut off the front and back together to create my new side panel pattern piece (after folding the bust dart out of the front piece and remembering to add seam allowances where necessary). I straightened off the top edge of the side panel and shortened it by 3" to create the stepped hem. I found this to be about as much as you would want to remove before you start seeing flesh above the waistband of a high waisted pair of trousers or skirt. The final thing I needed to do was to cut a strip of linen to fill in the centre back which I wanted to cut two separate panels for to make the most of the beautiful embroidered detail along the edges of the table cloth. I hemmed the top and bottom of this little infill, overlocked the long raw edges then topstitched it in place between the panels 3" up from the hem again. The infill finishes about 5" down from the neckline creating a sort of keyhole opening which fastens with a button at the nape. I'm really enjoying the combination of the modern cut of the top constructed with the more traditional embroidery. The weighty beautiful vintage linen turned out perfect for this style of top as it holds the structure nicely. I did have some scraps of white linen left over from my Wrap Top to use for the centre back and side panels but I actually only used it for the bias facing in the end. I'm so proud of myself for embracing this creative challenge and can't thank Portia enough for encouraging me to try something a little different. It has really pushed my creativity and construction knowledge and proved that I can do more than I think with my sewing. I'll definitely be looking at textiles differently in future and will make an effort to incorporate more refashioning into my sewing practice. I even feel like I might have the confidence to move on to something a little more challenging next time!

Here are the clothes refashioned during the SUMMER months of June, July and August in reverse chronological order. Just click on the hig...

In this tutorial, I'll walk you through the simple, quick process of adding a stretchy waistband to a vintage round tablecloth to make a skirt. Using this technique, you can turn any cute round tablecloth into a skirt! This is an easy beginner sewing project. See a second tablecloth conversion her

via This is wonderful, isn't it? I love it. It would make me smile every time I passed by the table. What a fun tablecloth. I think the person who did the embroidery had fun doing it. xo

Hand painted 100% linen large tablecloth, natural colour/beige, 150x250 cm. Each piece is an original, hand painted by designer Persephanie Economy. No two pieces are the same. Words 'Facciamo un brindisi!' written on the side of tablecloth, translates to 'Lets make a toast!'. Marking the precious memories made over the dinning table.

See your table linen in a whole new light!

how to sew a tablecloth dress from vintage linens with pattern M8108. If you like upcycled clothing, sustainable kitch, and repurposed fashion,

There are some fabrics you look at and just know what they are meant to be. They speak to you in a voice so loud, you have no choice, but to respond. While at an estate sale last week I had such an experience. I went in search of sewing patterns, notions and fabrics. The sale was promoted as having tons of sewing supplies but, the fabric prospects were less than stellar. I found myself in a room full of crocheted and embroidered holiday themed linens. I was thumbing through a stack and came across a cream colored crocheted table cloth. It has ovals stitched in adorable groups of four and scallops along the entire edge. My cousin over at Bakerchet crochets and I am well aware of the time energy and work that goes into creating such a piece. The price was good so bought it and began to respond to what the fabric was calling me to. I was going to turn this tablecloth into Bohemian style dress or tunic. I had the pattern for Simplicity 1757 in my stash and needed to figure out how to turn my tablecloth into it while maintaining the scallop details. I used view B as my base for this pattern. First I folded the tablecloth lengthwise wrong sides together with the scalloped edges even. I wanted it wrong sides together to be certain my stitching lines were on the right side of the fabric. I then marked the center of the what would be the radius (Yes, you do use geometry after high school). Using the center line as a guide I lined up the top of each pattern piece to the fold. I did this to be sure the front and back would be the same length. You will see that the tablecloth extends past the sleeve and bottom hem. What you cannot see in this picture is that the front pattern piece was placed exactly like this on the opposite side. I used a disappearing ink pen to trace the top of the pattern on the fabric allowing the top sleeve extend to the end of the tablecloth. There is only one notch on the top so I was sure to mark it well before cutting it out. There are stitching lines on the pattern that need to be transferred to the table cloth. I found that those lines created a dress that had more ease than I wanted; it was too loose. If you want yours loose follow them and do not add the back casing, like I did. For a more fitted dress, follow my steps explained later. I cut the front and back pieces out along the top and followed the pattern instructions for View B. I used a longer stitch, about 4.0mm and changed my thread to mercerized cotton thread for sewing. This thread is stronger and thicker and I thought it had similar texture to the thread of the crochet. When I got to the elasticized casing step, I repeated it for the back as well. With the excess length in my tablecloth sleeves, I found this step cinched the dress in more and made it less frumpy in back. For steps 8-12 I used purchased bias tape to finish the neckline. I stitched it to the right side of the neckline, then flipped it to the inside and stitched it again. Bias tape on the neckline For the remainder of the steps, here is what I did (the photos show the wrong side of the dress, but this step should be done on the right side.) Using Bira, my custom dress form I pinned the side seams together and marked the stitching line. I took the lines up to just below the armpits. If you do not have a dress form, you will need the help of a partner. Put the dress on and have your partner line up the edges of your trim or scallops and secure them with pins or clips. Then, have them pin the side seams along your body to suit your fit and pin and mark the seam line on front and back. Pinning and marking the side seams Side seams from underarm to dress bottom. Once marked I took the dress off the form, realigned the stitching lines, pinned aggressively and stitched the side seams. I them stitched the side seams a second time to be certain it was secure. Voila! All done and ready to wear! I am wearing a black (nude ;-p) slip dress underneath. I really like this dress! It turned out exactly as I hoped it would. If you make one come back and let me know; I would love to see it! Happy Sewing, Bianca

Have a vintage tablecloth laying dormant in a closet? Do like I did and repurpose it into a summer skirt! I trimmed off the edge...

Flower Pattern Farmhouse Table Cloth, Modern Rectangle Tablecloth Ideas for Dining Table, Simple Linen Tablecloth for Round Table Time for Dining Room! Perfect solution for your Kitchen & Dining Home Textile or Rustic Wedding. Enjoy your dinner time and ready to welcome guests! Material: Linen blending, printing and dyeing flower pattern Package includes - 1 Tablecloth Size: 54x54inch (140x140cm) (square size for round table) 54x71inch (140x180cm) 54x79inch (140x200cm) 54x87inch (140x220cm) 54x94inch (140x240cm) This unique natural flax table cloth is suitable for dining table, tea table, piano cover, bedstand, etc. These decorative tablecloths are perfect for themed events or special occasions. *Washing Notice: 1. Machine washable, Washing should not be soaked for too long 2. Neutral detergent recommended, do not immerse in hot water 3. Gentle washing, do not twist too hard when dry 4. Low temperature ironing, avoid exposuring to sunlight for a long time We will well pack and ship out your orders within 2 business days after we receive your payment. *Due to different monitor settings, some colors may seem slightly different on your screen. Your orders will be sent out with standard shipping, which you can expect delivery between 8-12 days. Thank you for stopping by! View and Buy More Beautiful Tablecloth for Home Decoration >>

Handmade linen embroidered table cloth. Total size 69x59 inches (175x150 cm). Embroidery area 49.2x33.4 inches (125x85 cm) COMPOSITION fabric 100% linen embroidery 100% cotton CARE MACHINE WASH UP TO 30ºC/86ºF GENTLE CYCLE DO NOT BLEACH IRON UP TO 110ºC/230ºF DO NOT TUMBLE DRY

◎Please note!!! We measure tablecloths in inches and centimetres. Please measure your table in these two units!!! As the tablecloth is a custom product, please accurately measure the size of your table. If you are not sure please contact us and we will be happy to help. ◎Custom size available. Please contact us! We sell the original fabric, you can buy the original fabric to make bags, pillow, clothes, etc. ▲ Other colour:https://www.etsy.com/listing/1329236279/cotton-tassel-tableclothoval?ref=listings_manager_grid ▲ Placemat:https://www.etsy.com/listing/1073611451/cotton-table-runnersmodern-coasterround?ref=listings_manager_grid ◎DETAILS -Materials:Cotton, Linen -Type:Square, Rectangle, Round, Oval ▲ Dimensions include tassels, all dimensions are manually measured, please allow for a little error. ▲ It will shrink by 3% after washing. -Size: Napkin 11x17" (30x45 cm) 24x24 inches (60x60 cm) 31x31 inches (80x80 cm) 35x35 inches (90x90 cm) 39x39 inches (100x100 cm) 39x55 inches (100x140 cm) 55x55 inches (140x140 cm) 43x67 inches (110x170 cm) 55x71 inches (140x180 cm) 55x79 inches (140x200 cm) 55x87 inches (140x220 cm) 55x102 inches (140x260 cm) 55x118 inches (140x300 cm) Round 55 inches (140cm) Round 59 inches (150cm) Round 90 inches (230cm) Oval 43x67 inches Oval 55x71 inches Oval 55x79 inches Oval 55x87 inches Oval 55x102 inches Oval 55x118 inches The tablecloth protects the table and can decorate your space. The table can not be changed often, but the tablecloth can, you can follow your mood, change a different tablecloth. If you're still looking for a gift, check out our fabric! This tablecloth is a great gift for any holiday, mother's Day, Father's Day, Valentine's Day, wedding, honeymoon, birthday, anniversary, Halloween, Christmas or any other occasion to show your love to her/him. Even if it's not a gift, it's perfect for indoors or outdoors. It can be used in your kitchen, dining room, garden, patio, balcony, camping and picnic, or even as a dust cover to protect your favorite Musical Instruments and other items. ◎TAKING CARE -Hand washing recommended (Below 30 C) -Dry gentle -Do not bleach,do not insolate -When drying, straighten all surfaces to reduce shrinkage. ◎INSTRUCTIONS -Because this product is handmade the colour and detail may vary. -Because this product is affected by the lighting environment, the color may vary. -We will carefully package and protect the product so that it can be safely delivered to you. ▲ Order shipping time, normally it takes 10 - 20 day. (The shipping time is for reference only) ▲ Please leave your PHONE NUMBER in the "note to seller" to make sure the carrier can contact you during delivery.. ◎IF you have any question PLEASE free to contact me.❤ ============================================= For more items pls visit our shop: https://www.etsy.com/shop/PointLine Thanks for stopping by!

Al fresco dining is on my mind these days. Here in Northern California, the weather is phenomenal almost all the time, but the draw to go outside to eat is particularly strong now, with evenings warm and light enough to be out at dinnertime. And it's strange for me, coming from upstate NY, but there are almost no insects here! So, as a bonus, eating outside is not a battle with mosquitoes and deer flies! Wahoo! To brighten up our dining space, I love the look of Mexican oilcloth--it's colorful with some cute designs, but it's also water-proof and fairly inexpensive. I've seen lovely tutorials for square or rectangular tables, but we have round ones, so I've put together some instructions for making a custom, fitted tablecloth (with a cutie scalloped border) for your round table. Materials: Mexican oilcloth (amount will vary, depending on the size of your table) Ruler (I like this one) Kitchen twine Pencil Calculator Scissors, rotary cutter, self-healing mat Standard sewing stuff--machine, straight pins, thread, etc. Measure your table: Take the diameter measurement of your table (make sure you are taking it at the very widest point). Add 1/2" to this measurement to account for the 1/4" seam allowance for both sides. Note: if your table diameter + seam allowance is greater than the width of your fabric, you will have to make two half-circles and sew them together (don't forget the seam allowance!). If your table has an apron (or edge) that you want to cover, measure the minimum needed to cover it. We will be adding more to that measurement to take into account the length of the scallops, but we'll do that later. Cutting fabric: Fold your fabric in half, then fold again (to make it into quarters) ensuring the edges match up perfectly. . Folded in half (fold at the bottom) Folded in half again (fold at right side) Using your diameter (+ seam allowance measurement), divide by 2. That's the radius (remember high school geometry? It's back!) Take your twine, and make a little loop in it, measure out the length to be equal to that of the radius and put your pencil point in the loop. Holding the other end securely at the corner of your folds, trace a quarter of a circle on the oilcloth. Double-check that you hit your radius length on both sides of the fabric. Maybe check it again :) Trace the arc of your circle using the string and pencil Cut along the line through all thicknesses of fabric, being careful to keep the folds together and edges lined up. It's a bit thick to pin, but it if you can, it will make it easier. There it is, a perfect circle! Next, you need to calculate the length of the strip to go around your circle. Length around a circle (circumference) is equal to circle diameter x pi (3.14). Use the real diameter, not including the seam allowance. If you are skeptical of the value you get with the calculation (I was!) use your tape measure to prove it to yourself. Next determine how much to add in seam allowance. Chances are, you won't be able to get the full length of your strip from one length of fabric. For this table, I used two shorter strips to make the full length. Therefore, it will take 2 seams to make the circle. For EACH seam you need, add 1/2" seam allowance to the circumference measurement. Scallops, next. Mine were 4" wide. Incredibly, this measurement created equally spaced scallops around my table, but if yours does not, divide the circumference (do not include seam allowance) by the desired width of scallops. Evenly spaced is great, but keeping a whole number makes life easier down the road. With length taken care of, you next need the width (drop) of the strip. You measured the minimum length for the drop of the tablecloth, but you will be making cute scallops. I made scallops that are 2 inches long (4 inches wide), so add 2" to the width measurement. Then, add 1/4" for seam allowance. My strips were 4" in width (1.75" minimum cloth drop + 2" for scallops + 1/4" seam allowance). Cut your strips using a rotary cutter and self-healing mat. On the wrong side, make a line 2" from the edge down the length of the strip. My flexible ruler (shown above) has tiny holes every 1/2", so holding a pencil point in one (pivot point) and a pencil point in another 2" away and tracing the arc creates perfect semi-circles of the desired width. Yay! You can also use the string method (above) or a dish with a diameter of 4". Start in 1/4" (for seam allowance) from the edge, then measure 2" and mark with a dot. Make your arc. Continue on...and on... Notice the 1/4" seam allowance on the left, before the start of the scallop Once you get a few scallops sketched out, cut the fabric and lay the cut fabric on the rest of the strip to make a template. Trace the outline, then cut. Next, connect the strips to make a circle. With right sides together, pin at the short ends. You should have left 1/4" on the ends so your scallops remain the proper size (see below). Once the strips are connected, finish the edge of the scallop with a zigzag, double-backing at each indentation to prevent ripping of the fabric during use. Check that it fits around your table. Make the 12 - 3 - 6 - 9 o'clock positions on your perfect circle (fold in quarters and clip at the fold). Then clip at the quarters of your circular strip. Clip at the fold to mark the quarters of your circle With right sides facing, pin the circular strip to the circle piece, matching each clipped point. You will need to make shallow clips (less than 1/4 in length) along the entire edge of the circular strip to get it to fit the curve of the top. Pin copiously! Sew 1/4" from the edge. Make sure your seam line is further inward than the clips along the edge or you will see them when you turn it. Turn right side out and fit it onto your table. Yay!

Here are the clothes refashioned in SPRING March, April & May - in reverse chrono order. Just click on the highlighted title to get ...

This top would have been my contribution to The Refashioners 2020 which has unfortunately but understandably been cancelled this year. I had already completed my project and wanted to share it with you all as (despite not being the most dramatic refashion ever) it really pushed me outside my sewing comfort zone and I'm hoping it might inspire some of you to give it a try too! Portia's yearly refashioning challenge started back in 2011 and carries an important message, encouraging sewers to look at fabric and clothing in a new light. I try to make careful choices when it comes to the fabric I use and how it has been produced. Despite turning away from fast fashion and making my own clothes I am aware that my fabric consumption has its own impact on the environment. One of the best ways to care for our planet and sew sustainably is to reuse and repurpose textiles which already exist. The theme for this year's challenge was planned to be 'use what you have' which felt a little more accessible to me as a newbie refashioner as you can use household items with large flat surface areas of fabric like bedding, curtains and tableware. I was still really daunted by this challenge. I've always thought I that the transformation challenge on The Great British Sewing Bee would be my downfall. When I cook I'm not the kind of cook who throws things in to a pan on instinct...I like a recipe! My creative brain just does not seem to think in that way. So I eased in to my first refashion by using a tablecloth. Despite being a flat piece of fabric I really tried my best to make the most of what the table cloth gave me; right down to using one of the loops of edge stitching as the loop for my button at the centre back neckline. In the spirit of 'use what you have' the covered button I had stashed away, salvaged from an old RTW top. When I moved to Dorking last summer I had a huge sort out and only brought with me things I thought I really needed so I didn't have any spare textiles asking to be refashioned. Instead I turned to eBay as my source of unwanted textiles. I've long been a fan and follower of the work of embroidery artists on Instagram like Tessa Perlow who embroiders on to existing garments to transform them into unique worn works of art. However, I've never been able to find the time or patience to do this kind of work myself. This project is sort of a cheats way of achieving a hand embroidered top, by using an already embroidered textile! I chose this tablecloth because I fell in love with the embroidery. I haven't found a single flaw in the beautiful symmetrical handwork. I felt kind of awful cutting in to it but focused on the fact that all that work is being appreciated and given another life. I loved the colours of it and that it was quite big and bold, plus the embroidered green border added another element to play with. But what really sold it to me was how the embroidery was arranged in clear quarter and semi-circular sections. I enjoyed figuring out how to place those to their best advantage on the top and use as much of the embroidery as possible. I'm really pleased with how it turned out. I think my favourite part is the back with those big arcs of floral embroidery meeting in the middle. I made the refashioning project feel a little more manageable to me by starting with a pattern rather than diving straight in to draping or cutting something from scratch. Baby steps! However, I did fully flex my pattern hacking muscles to make the design of the top much closer to my inspiration. Pinterest is still one of my favourite ways to collect inspiration for my sewing projects and over the last year or so I've pinned numerous boxy little tops with interesting details and style lines. The simplicity of the example below really grabbed me. I considered using the free tank tutorial from Fabrics-Store.com (they have a tonne of great resources, patterns and tutorials on their website FYI) but ultimately decided I did want a bit of shaping in the bust. I was torn between the Afternoon Lyra Tank and the Ashton Top from Helen's Closet. I ended up plumping for the Ashton because it seemed to have a lot of mileage in it with options for an all in one facing or bias faced neckline and all sorts of hacks popping up online. When I'm splashing out on a pattern I like to think I'm going to use it multiple times. I'm really pleased with my choice as I think the shaping and fit is great but I'll discuss the pattern more in depth in a future post as I have another hacked version of it to share with you! For reference I cut the size 6 B cup. To start with I extended the length of the shoulder seam a little to match the squarer shape of the inspiration garment. Then I drew a line straight down from the outer edge of the shoulder to the hem on both the front and back pattern pieces. I cut down these lines and attached the pieces I'd cut off the front and back together to create my new side panel pattern piece (after folding the bust dart out of the front piece and remembering to add seam allowances where necessary). I straightened off the top edge of the side panel and shortened it by 3" to create the stepped hem. I found this to be about as much as you would want to remove before you start seeing flesh above the waistband of a high waisted pair of trousers or skirt. The final thing I needed to do was to cut a strip of linen to fill in the centre back which I wanted to cut two separate panels for to make the most of the beautiful embroidered detail along the edges of the table cloth. I hemmed the top and bottom of this little infill, overlocked the long raw edges then topstitched it in place between the panels 3" up from the hem again. The infill finishes about 5" down from the neckline creating a sort of keyhole opening which fastens with a button at the nape. I'm really enjoying the combination of the modern cut of the top constructed with the more traditional embroidery. The weighty beautiful vintage linen turned out perfect for this style of top as it holds the structure nicely. I did have some scraps of white linen left over from my Wrap Top to use for the centre back and side panels but I actually only used it for the bias facing in the end. I'm so proud of myself for embracing this creative challenge and can't thank Portia enough for encouraging me to try something a little different. It has really pushed my creativity and construction knowledge and proved that I can do more than I think with my sewing. I'll definitely be looking at textiles differently in future and will make an effort to incorporate more refashioning into my sewing practice. I even feel like I might have the confidence to move on to something a little more challenging next time!
