

We scoured our favorite high-end fitted kitchen makers (from Boffi to Bulthaup to Henrybuilt) for ideals to steal at home. N.B.: This post is an update; it

Our friend Klara Ripa has an awesome kitchen. First of all the cabinets in the kitchen are from when the house was built. And second Klara is very thrifty and has great ideas. She painted one wall black and the rest white. Then she cut triangles out of self adhesive vinyl and stuck them to…

These timeless kitchens, with classic and of-the-moment examples of cabinetry, countertops, and ceiling treatments, will stand the test of time.

Is refacing kitchen cabinets a viable option or a mail-marketed ripoff?

When typing ‘modern kitchen design’ we start receiving new concepts and information we are not used to such as handleless kitchen cabinets.

Our oldest daughter is finally back home and over the weekend we unloaded the moving truck with all of her college bedroom furniture and the memorabilia fro ...

PACKAGE OFFER! Cartmel creates the aesthetic of a timber door with visible grain detailing. Product Description: 5 piece shaker door with flat centre panel & feature joints (foil door) Product Finish: Matt finished with an ash wood grain structure Door Material: 22 mm MDF Covering Material: Foil wrapped, ABS edge Cartmel comes in different colours: Ivory, Sage Green, Cashmere, Mussel, Light Grey, White, Indigo, Dust Grey, Anthracite, Oak, Navy Blue Our Package offer includes the below units: 1. Base Cabinet Single 2 x (150-600 mm) 2. Base Cabinet Double 1 x (700-1000 mm) 3. Wall Cabinet Single 2 x (150-600 mm) (including soft-close hinges) CONTACT US WITH ANY QUESTIONS! Key Feature and Benefits: 1. Ready built rigid cabinets (excluding 900 x 900 corner base) • No Assembly required • Save 70% of fitting time 2. 18 mm MFC cabinets with 18 mm solid Back • No cardboard back to pop-out • Solid back means cabinets remain square • Doors stays aligned • No loose hinges in long term use 3. Adjustable legs on base cabinets • Can level the cabinets regardless of floor situation • Height of worktop can adjust to your preference • Protects cabinets from the flood 4. Quality soft close Hinges • 3-way adjustments for the doors • Clip on and off for easy door installation • No slamming of the doors 5. Heavy duty soft close drawers • 40 kg weight limit per drawers • 2D front face adjustment 6. PVC edging on cabinets (NO PAPER EDGING) • Hard wearing • Easy to clean Unit sizes in MM Height (H) x Depth (D) excluding door thickness: • Base and drawer cabinets are 870 mm H x 500 mm D and W from 150-1200mm (including 150 mm adjustable legs) • Wall cabinets are 720 mm H x 300 mm D • Tall wall cabinets are 900 mm H x 300 mm D • Bridging cabinets are 360 mm H x 300 mm D • Larder and appliance cabinets are 2120 mm H x 500 mm D (including 150 mm adjustable leg • Tall larder and appliance cabinets are 2300 mm H x 500 mm D (including 150 mm adjustable legs). • All the units are made to measure; we do manufacture all our units to customers specifications. • For complete kitchen units, please do contact us! • Please be advised that our unit package does not include: handles, panels, plinth, framework, worktop. Please call to arrange an appointment. We look forward to hearing from you soon.
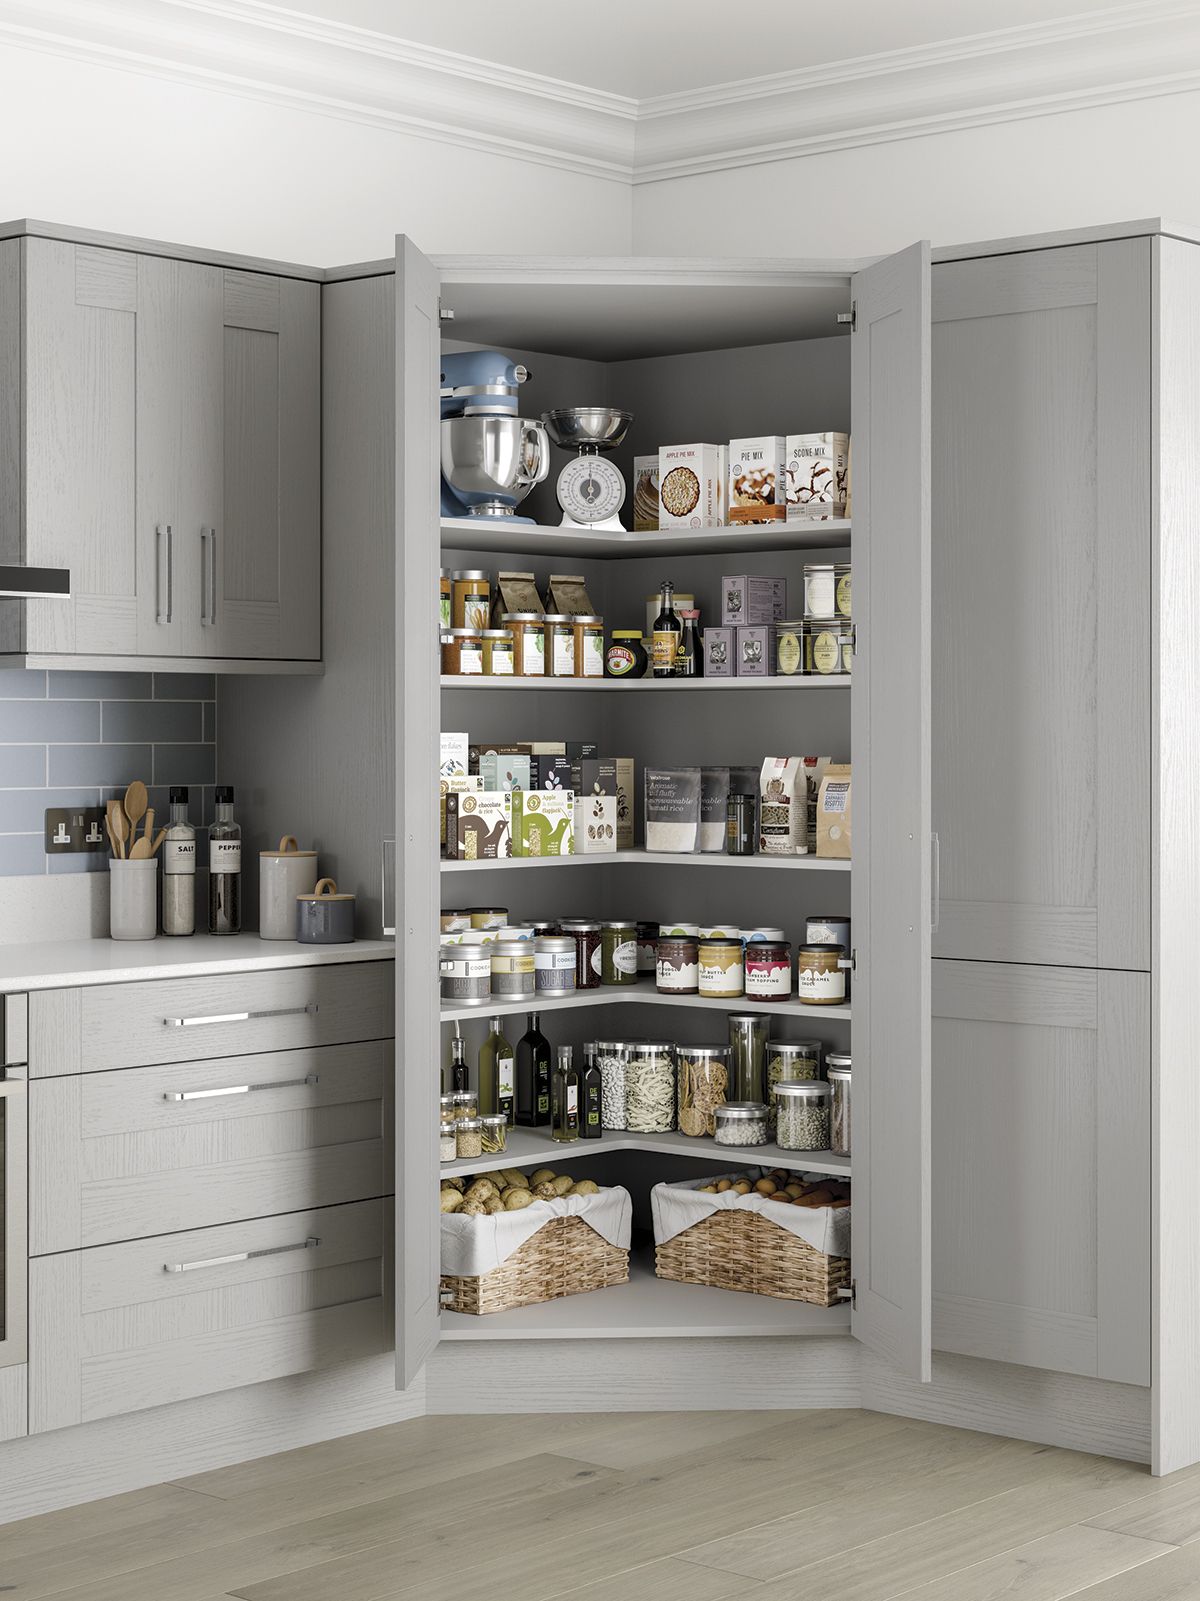
The Top 10 ways to include a pantry in your client's kitchen design.

Transform your kitchen with striking blue cabinet ideas, from bold cobalt to serene aqua, adding a vibrant and stylish touch.

Thomas Lykke of OEO Studio and Garde Hvalsøe collaborated on "A Kitchen of Love", a modular kitchen furniture solution called, Lykke Model.

The easiest way to follow your favorite blogs

Hubert is a minimalist interior located in Paris, France, designed by Septembre.

Of all the traditions in woodworking, frugality may be the most time-honored and deeply held. Two types of materials—sheet goods and hardwoods—require distinct approaches to maximize savings.

Is your kitchen a bit boring? Try painting your kitchen cabinets in one of these trending, yet timeless colors. Choose the best kitchen cabinet color ideas from our selection.

Storage solutions that work for small kitchens and spacious open-concept spaces alike, these kitchen organization ideas will save you time and money.

See the pretty and practical space.

Everything you need to know and do before buying, selling or renting a home. Find tips, research and step-by-step guides to build confidence around your next move.

Friends, the day is here! I’m FINALLY sharing the rest of cabinet painting projects as well as revealing how it turned out! I'm sorry that it took me awhile to get it posted but thank you for being patient with me! As I’ve vented in the past, when we bought our house I was not all that impressed by our kitchen but I knew that with a little TLC we could make it our own.We don’t have a large budget for refinishing the space, so painting the cabinets has been a GREAT way to update the kitchen without paying a high price tag or replacing all the cabinets. It might have taken quite a bit of time, but if done correctly they will save you a lot of money and should last you for years (or so I’ve been told, I’ll let you know if that is true in a year or soJ ) Let me remind you what our kitchen looked like before I started painting. Getting to just this point, certainly has been no cake walk as it’s taken us two years to get to this point. So far since moving in we have replaced all the appliances, painted the walls, got new countertops and added a breakfast bar, got a new sink and faucet, converted the can light into a pendant light over the sink, and installed new backsplash .... and now have painted the cabinets! And here they are all finished!! So here's what we did from start to finish. The way that I tackled this project was by doing all of the kitchen cabinet doors first and then once they were completely done and curing, I begun working on the cabinet bases. The reason for this is that we wanted the kitchen to stay functioning and the cabinets stocked and appliances in place for as long as possible. Lot's of people are always curious about what the timeline looks like for this type of project so here is what my timeline/process looked like. The entire project took me 4 weeks to complete (that includes a week of cure time), and I have a full-time job so I was only able to work on them at night. I also didn't work on them every weekend, so this project could definitely take you a shorter amount of time. Days 1 -3: I removed all of the cabinet doors and draw fronts, and all of the hardware and hinges and labeled them. Next I sanded both the front and back side of the cabinet doors and draw fronts and then cleaned them using my new favorite degreaser and a liquid sander. You can read more about the prepping steps here. Day 4 - 7: Priming. I spent one day priming the back of the doors and drawers, spent the next day priming the front of the doors and drawers and then gave them a complete day to dry. I ended up only doing one coat of primer on the cabinet door and drawers, but looking back I wish I would of done two coats as it could of maybe let me get away with only two coats of paint. You can read more about the priming process here. After the primer had dried I sanded them using a 220 girt sanding block and then vacuumed and used tack cloth to get rid of all of any remaining debris. Days 8 - 13: Painting the cabinet door and drawers. For paint, I chose to use Benjamin Moore's Advance paint in Simply White. I ultimately decided to go with this paint because it's specifically made for cabinets, has easy clean up, has a self-leveling mechanism, and from my research of other's who have tackled this project, it seems to be a very popular choice, as well as, it's what carpenters in my local area also use which all made me feel confident in my choice. Like I mentioned above I ended up doing three coats of paint on all the doors and drawers. I did all of the backs first, let them dry at 24 hours (per the instructions on the can) and then flipped them over and did the fronts and did that x 3. I made sure that I did the front very last so that if anything scratched while being painted by the wood block raisers, the marks would be on the back and not the front. In terms of the technique I used to paint them, I used the same approach as seen in this video here on the blogpost by Sherry from Young House Love and I've used it before in other projects and it's worked well so I kept with it here. Basically I used a 2 inch brush to apply the paint around the inside edge trim, and then followed up with a mini foam roller to roll the middle inset panel of the cabinet, then the rail and stile portion of the cabinets and then the edges of the cabinets. The edges were the trickiest part for me on both the cabinets and the drawers as ours our slightly rounded which seemed to make dripping more prone. Basically all you want to make sure of is that nothing is puddling together or drip marks, because those will pretty much ruin the "perfect" white cabinets that you have envisioned in your mind. After I was done painting, I let them cure in basement for 7 days. The reason curing is so important is that hardens the paint, making it much harder to chip and also keeps the cabinet doors and bases from sticking together. Day 14: Once the cabinets were put in our basement to start curing I begun on the kitchen bases. I put the cabinet doors into the basement so that they didn't get sawdust debris all over them while sanding. To begin with the kitchen bases, I first cleared out all of the kitchen cabinets. Actually, I shouldn't say I, because this is where my husband stepped in and gave me some much appreciated help that I desperately needed. One of my followers told me before I started my kitchen cabinets that sometime during this project I would question my insanity, and sure enough that happened and it so happened specifically at this halfway mark because the cabinets were so labor intensive and I couldn't believe I was only half done at this point. Luckily though, it turned out that the cabinet bases weren't as awful or time consuming so what seemed like the halfway mark was really more like the 70% mark. Once the cabinets were cleared, we moved the appliances and started prepping the space for me to sand. We covered everything with plastic drop cloths, including our dining table light fixture and faucet and closed off both entrances to our kitchen also with plastic drop cloths. Next I sanded the cabinet bases using my Ryobi finish sander beginning with 60 grit and then going back over it with 220 grit. Unlike the cabinet doors, the base frames sanded up so quickly and I was able to get the bases down to basically bare wood (except for the crown molding), which I was excited about because bare wood means better adhesion to the primer and paint which ultimately means less likely for the paint to chip. Wahoo!!! Days 15 - 16: Priming the bases. After everything was sanded, vacuumed and wiped down with a tack cloth I began priming the bases of the cabinets. This time, I did two coats of primer on all of the cabinet bases. The way I tackled the cabinet bases is from starting at the top and working downwards. That said I would start at the crown molding, then at the top rail (horizontal piece) then the stiles (the vertical pieces) and then the additional rails. Days 17-20: Painting. Once the priming was finished and dry it was FINALLY time to paint the frames. At this point it felt like the light at the end of the tunnel because we were 90% finished. I did two coats of paint on the cabinet frames and only did the exterior of the frames. You could paint inside the cabinets, but that just meant more work for me. I thought about doing it, but that meant that cabinet shelves would be more prone to chipping, and plus only I see inside the cabinets and I didn't care at all. So that said, I didn't do them. Days 20 - 27 : Curing. Once painting the bases were completed, it was time to let them cure! Days 20 - 27: During this time, once the cabinet doors had cured for a week I began putting the hinges back on the cabinet doors and drawer in our basement. I also added new pads to the corner of the cabinet doors and drawers to help with keeping things from rubbing together and chipping. I also added the hardware back on which we just installed soon before beginning this project. We did that so that we didn't have to drill the holes into freshly painted cabinets and risk things from chipping. After the cabinet bases had cured, I prepped everything to install the cabinet doors back on. In some places, some paint had gotten on the inside of the cabinets so I used nail polish remover to get rid of it. Once all the cabinet doors was put back on here is how it turned out!!! What do you think?? Let's just say I'm in love! If you have any specific questions about this project that I didn't answer please feel free to ask in the comments below!! I still have more changes to be made with the rest of the kitchen which I will share later this week, but I'm SOOO happy with how it's looking so far!! Stay Tuned and thanks for stopping by:)

Introduction In March of 2011, we began our first large woodworking adventure. We decided to dump our gigantic eye-sore tube TV for a new LED LCD flatscreen TV. This large purchase introduced some problems, for example, how could we afford spending more money on an entertainment center. Our family room has large vaulted ceilings and a big blank wall. I just did not like how the puny TV stands look on our gigantic wall. And with three crazy kids, I wanted the TV out of harms way. My husband mentioned that he could build me an entertainment center. So we went and looked at entertainment centers I was interested in and they were $2,500 or more. Yeah right! So we made up our minds. We were going to build our own entertainment center for a fraction of the cost. I looked up entertainment centers online and took bits and pieces of each one. I knew I wanted the TV higher up than most entertainment centers to keep those tiny little hands from reaching my expensive TV. I also wanted the satellite receivers and DVD player out of reach and up on the top center piece. We looked up the exact dimensions for our TV and based our opening size on the TV size. We left about 3" of gap on all sides. The best part of the whole project was adding up the receipts at the end of the project and seeing how much we saved. In total we spent $546. Not bad considering the $2,500+ price tag on similar entertainment centers! Looking back, I can’t believe we actually built this with the tools we had at the time. Since then, we have inherited a lot of high quality tools from TJ’s mom, but we definitely took the hard route. We actually only had a cheap circular saw, table saw (borrowed from my mom), and miter saw. We borrowed the nail compressor and nail guns from a neighbor, a broken jig saw from a neighbor and a router from a co-worker. We posted our project on ana-white's brag website and were shocked at the positive response. Many people requested the plans, but we didn't have any plans. We just had a hand drawn piece of paper with notes and dimensions. This inspired us to start a website and post some of our projects with plans so others could enjoy these projects too and hopefully prevent some of our "lessons learned." Below are some of the other entertainment centers that have been built, based off of our entertainment center. They are beautiful! Entertainment Center by Dave-Mac Entertainment Center by azca33 The Entertainment Center by a.mcdaniel Estimated Cost: $550-$800* *Depends on the grade of wood you buy. #2 and better whitewood (AKA pine) is cheapest, then select pine, then poplar. (I would recommend select pine or poplar for the face frame pieces and maybe the drawer and door fronts—these are highly visible and take a little bit of abuse.) Ours cost $545, but I have updated the prices and they have gone up by about 10%. Dimensions: The overall size of the project is 94 1/2" wide by 83 5/8" tall. Tools Table saw Miter saw Jig saw Orbital sander Pneumatic nail guns Air compressor Circular saw Drill with bits Kreg Jig * *Recommended, but you could join the face frame through other methods (in our case, we didn’t have a Kreg Jig at the time, so we just nailed the face frame directly to the box…looking back we would’ve done this differently). Lumber and Materials Click the link here to view and download the Excel file. Other Materials Woodfiller Sandpaper Kreg Screws Cut List Click the link here to view and download the Excel file. Instructions: Step 1: Assemble the bookcase frames. Below are the pictures and the dimensions for the bookcase. We actually used the 1x12 pine for the sides, but looking back, I would recommend using the plywood because it is much straighter and stronger than the pine. For this plan and materials list, I have assumed plywood for the bookcase sides. The costs are about equal, so you can use whatever wood you want. Best part about the pine—no need to rip it on the table saw because it is already 11 ¼” wide. Side Bookcase Dimensions Bookcase Front Dimensions For the shelf pieces, we used 1x12 pine cut at 18 inches long. We cut the beadboard back from a 4' by 8' sheet of beadboard at 19 1/2 inches wide by 70 3/4 inches tall but didn't install it at the time because we wanted to paint it before it was assembled. This allowed us to get in the nooks and crannies and saved us some major headache. Bookcase Back Beadboard At the time, I screwed the bottom piece in from the side, but now that I have a Kreg Jig, I would screw pocket holes in from the bottom (outside of view). I also used 2” screws for the top piece and screwed it straight down. You could also cut the top piece at 18 inches and use a Kreg Jig or finish nails to secure it in place. It doesn't really matter since the top edges are covered by the crown molding. I would also recommend fixing the shelves with 2” or 2 ½” 16 gauge finish nails. Unless you want the shelves to be movable, then you can use the shelf hole guide from Kreg Jig. I drew a guide line at the bottom of each shelf with a building square or speed square to make sure I was installing the shelves completely level (perpendicular to the sides). I also put a cleat piece on the top and bottom to strengthen the whole assembly. Step 2: Build the face frames for the bookcases. This can be done before or after step 3. At the time I didn't have a Kreg Jig system to join the face frame pieces together. A little bit later we built an entertainment center for our neighbor and used the Kreg Jig to join the face frame together and it worked out much better. We simply measured the length of the box and cut the stiles and rails to the dimensions required. We used the finish nail gun to nail them into the case pieces. As you can see from the drawing, I kept about an 1/8” to a ¼” overlap about the horizontal shelf. Bookcase Face Frame, Front Bookcase Face Frame, Back (With Pocket Holes) The top face frame piece is arched to give a little visual appeal. We actually had to borrow a broken jig saw from one of our neighbors. The shoe of the saw was not locked, so I had to hold the saw as perpendicular as possible when I made the cuts here. Needless to say, I had to do a lot of sanding to get it to look right. Look here for a tip about cutting curves. We talked about adding can down lights at the top cubby to add that wow factor, but decided it would be a lot of work to wire it and the cubby is fairly small and the light would cast a shadow on any larger decoration we placed in that cubby. However, a.mcdaniel on Ana White’s website did this very effectively and it looks great! Step 3: Build the bottom center and the top center piece. These pieces are deeper than the 11 ¼” deep bookcases. We used birch veneer plywood to get the 18” depth for the frame and interior pieces. The width of the center pieces were designed to fit our 47” flatscreen TV. We also give a little bit of wiggle room in case we wanted a 52” flatscreen TV or possibly a 55” flatscreen TV. We checked the dimensions of the TV (with the stand) online and built it so it would have about 3” of extra space on the sides and top. We have since bought a wall mount for our TV and are grateful we have a few inches on each side to maneuver the TV in and out. If you have a different size TV, the width of the plans can be modified to create a custom “built-in” look. I love how the proportions of the entertainment center match our TV. It looks like the entertainment center was built to fit our TV (which it was!). Center Pieces Side Dimensions We designed the bottom to have four square drawers and two cabinet doors. Kristen really liked the look of square drawers, so we adjusted the doors to create a square drawer. And an unintended serendipity is that our drawers fit DVD cases perfectly! Center Bottom After the frame was built and the interior partition pieces were installed, I cut the beadboard with a circular saw (since the edges don’t have to be perfectly straight or smooth) and set it aside for the painting. Center Bottom Beadboard Center Top Beadboard The center top piece was built to fit our satellite, DVD player, media player, gaming console, etc. On all the entertainment centers we looked at, we noticed the equipment was located on the bottom piece. This is great for adults, but our young kids are constantly playing with anything in reach. We decided to locate the equipment up higher to keep those fingers off of the equipment. The downside is that the cords have to run longer to plug into the wall or TV. The height of our equipment shelf is pretty tight, so I would recommend making adjustments based on your equipment. The upper three cubbies were built to hold decorations and family pictures. Kristen also liked the square proportional look up there. Center Top Step 4: Build the face frames for the bookcases and the center top and bottom pieces. At the time I didn’t have a Kreg Jig system to join the face frame pieces together. A little bit later we built an entertainment center for our neighbor and used the Kreg Jig to join the face frame together and it worked out much better. We simply measured the length of the box and cut the stiles and rails to the dimensions required. We used the finish nail gun to nail them into the pieces plywood box. Bottom Center Face Frame, Front Bottom Center Face Frame, Back (With Pocket Holes) The face frame on the bottom is all standard 1x2 pine. We used the cheaper pine, but if you want face frames that are harder, knot-free and straighter, I would recommend the select pine (about double the cost, but it is a better product). At the top, we used 1x2 pine for the vertical stiles and the center rail, but I ripped the bottom rail to about 5/8” to create a 1/8” lip, but allow access and visual access to the equipment above. (Don’t you have it when you are trying the change the channel and your remote has to be pointed directly at the satellite.) The top face frame at the cubbies is arched to match the bookcases. Top Center Face Frame, Front Top Center Face Frame, Back (With Pocket Holes) Step 5: Paint the boxes and beadboard. At this point, it is a good idea to paint the cases and beadboard back. I put on the face frames before I painted the boxes, but looking back it may be easier to paint them separate and then assemble the face frames and back. We used a coat of oil based primer tinted as dark as possible and then two coats of high quality oil based paint. Beware, the paint fumes were pretty back and it was much more difficult to clean up. But the oil based paint left a great finish and it seemed to cover the wood very good. Prime Coat I didn't paint the areas where there are drawers because they are not visible. Final Coat Step 6: Nail on the face frames and backing I used a 16 gauge finish nail gun to attach the face frame to the box. For the beadboard back, I used a pneumatic stapler. You could also use a liquid nail type adhesive to glue the backing on, but it would still need a few nails to hold it in place while it dries. It is a good idea to make sure the boxes are square when you nail on the face frames and backing. You can check this by measuring diagonally from corner to corner or placing the pieces on a perfectly level surface and checking the plumb and level with a level. The face frame and beadboard backing will create the lateral strength for the furniture and can be adjusted at this point with a little pressure during the assembly. Step 7: Assemble the pieces. A big advantage to this entertainment center is the ability to break down into four different pieces to get it to fit in your house and the ability to move it. After the pieces are all built, we found a flat level spot on the ground to assemble them as a dry-fit before we moved it in the house. We lined up the backs of the bookcases with the center bottom piece and then clamped them together while we make minor adjustments. After it was lined up, I drilled in some pilot holes with a countersink drill bit from the center bottom piece to the side bookcases. Since the center piece has drawers in these areas, the screws are concealed from view. I put about four 1 ¼” screws into each bookcase. Screws from the Bottom Center to the Bookcases The next step was pretty hard to do with just me and my wife, so I built a stand at 33 inches with 2x4s to hold the center top piece in pace while I screwed it together. I also predrilled pilot holes at the top of the bookcases so they would be ready for quick screwing. We both grabbed an end and hoisted the center top piece into place and up on top of the temporary stand. I grabbed some clamps and clamped it together and made some minor adjustments until it was ready to screw in. Then I moved the stand to the other side and made sure everything lined up and then screwed three or four 1 ¼” screws in. Screws from the Bookcases to the Center Top Step 8: Cut the crown and baseboard. After the pieces were assembled, I measured and cut the crown and baseboard. The crown is fairly simple because it butts into the top center piece from the bookcases and it goes around the top center piece. The baseboards were a little more tricky because they span three pieces at the bottom. There will be a little bit of a gap from the bookcases to the center bottom piece because it has to be able to be unassembled and reassembled, but it can be done pretty tight. I decided to paint these before I nailed them on and then touch them up after, but it is up to you. Step 9: Build the drawers. Building the drawers took a little bit of educating myself. I measured the drawers in my kitchen and looked at how they were attached and what sizes were available as far as drawer slides. I determined the drawers were about 1 inch shorter in width than the face frame opening. They were also about 1 3/16 inches shorter. The drawer slides were available in 14, 16, 18, 20 and 22 inches. I chose the 16 inches for our drawers. As you can see from the picture below, I installed the slides at the bottom end of the face frame and made sure it was flush with the front. I added a few filler pieces in the back to fill in the gap between the slides and the vertical wood pieces. I attached the slide pieces to the bottom of the drawer and made sure they fit. After the drawers were all in, I cut the drawer fronts and doors. Drawer Slides Step 10: Cut the doors and drawer fronts. The measurements for the doors were based on an overlap of about 3/8 inch at each edge. We also bought the hinges so I could mount the hinges to the box and hold up the doors to make sure they lined up perfectly. The size of the doors may vary slightly depending on the layout of the hinges, so make sure you purchase your hinges before you cut the doors. Bookcase Bottom Doors I used dimensional pine for all the doors and drawer fronts except the center doors. These were too big for the 1x12 (the largest piece available at Home Depot), so I bought the expensive glued together pieces. Looking back at this, I may have gone with some more expensive select pine or poplar wood and glued them together to get the width because the wood I used has some knots and bows in it. I am still thinking about replacing some of those doors. Center Bottom Drawer Fronts and Doors After I cut all the doors and drawer fronts, I actually borrowed a router from a friend at work. He was nice enough to lend me some router bits as well. We wanted the profile edging to match our existing cabinets, so we used a roundover bit (either a ¼” or 3/8”). The bit was raised enough to give it the round and then edge profile. I lined everything up and attached the doors to the hinges first. After that, I was able to hold the drawer fronts in place and nail them from the front. Step 11: Touch up. After everything assembled in place in our garage, we went back over it with paint to touch everything up. Step 12: Final assembly and decorations. We disassembled it all and carried the pieces into the family room one by one. We then assembled it in the final resting location with the same steps mentioned in number 7. Luckily, Mother's Day was a few weeks away and it was the perfect excuse to buy the decorations. Note: We did not put the beadboard in the back behind the TV because we felt it would be too much black. We left it open for cords and so it would open it up a little. We did put a cool cord hider (this one) back behind it so the cords aren't very noticeable. We also later added a TV mount (this one, for such a great price!). Overall, we love the entertainment center and everyone who sees it still cannot believe we built it... and sometimes, neither can we!

How to build kitchen cabinets! This plan is for an 18" wide full overlay face frame pull out trash bin. It can also be used as a cupboard with door for storage - just add shelves. Free easy step by step plans.

Here is the next step in our DIY Built-Ins Series. If you missed our previous posts for the reveal and how to build your own base cabinets be sure to check them out. Today we are going to go through how we installed the doors and drawers (which is step five in the base cabinet post). […]
