

These stays are certainly the most complex cording project I've done, so I wanted to share how I've been going about it! First off, I'm using a totally different cording method than the ones shown in my Making a Corded Petticoat post. In both methods shown in that tutorial, the cord was put in place first and its channel was sewn around it. Those methods work just fine for a corded petticoat, but won't work very well for these stays. Instead, I'm sewing channels into the fabric first, then inserting the cording afterwards. As a reminder, this is the pattern I'm working with: Fabric Prep Since the criss-cross cording is the most difficult part of these stays, that's what we'll focus on. Each of the squares that make up the criss-cross pattern are only 0.25" wide, so they're very small and difficult to sew accurately. The space between each square forms the channel that the cord threads through. I'm using a green shot cotton as the pretty outer fashion layer of the stays, with two layers of thin but tightly woven white cotton as the strength layers. My stitches will go through all three layers of fabric, but the cording will be run between the two white layers of cotton. The first challenge was figuring out how to mark the stitching guidelines on the fabric. I could have made all the markings on the back of each piece, but I find that the top side of my stitching often looks a bit more precise than the back, so I needed a way to mark the green fabric so that I could stitch accurately, but not have the markings visible later. Squares marked with water soluble pen, with a penny for scale. At first I tried using a water soluble fabric marker that had a relatively fine tip. It showed up very well on the fabric, but since it is a marker and the fabric wicked the ink out a bit, the line it left was fairly thick. The thicker line made it very hard to see where exactly to stitch. Some of my test squares were more parallelogram than square, and the width of the squares varied between 5/16" and 3/16" wide. It may seem like I'm being overly picky, but that is a difference of 1/8", which means I was off in some areas by the width of half of a square! When working at such a small scale, even a little bit of deviation becomes extremely obvious. Wibbly wobbly stitching due to wide fabric marker guidelines. I considered using a fine mechanical pencil to draw more precise, accurate lines, but there were two potential issues. One, I was worried it wouldn't wash off well, leaving me with pencil lines all over my stays. Two, it's actually pretty hard to draw an accurate line on this fabric with a mechanical pencil, as the pressure of the lead warps and distorts the fabric as you're trying to draw. Can't draw a straight line b/c the pressure of the lead warps the fabric. Luckily, I was able to solve both issues at once with my favorite secret weapon: Mah super-sekrit weapon. Shh, don't tell! Starch has saved my butt on many a sewing project. Here, it serves two purposes. First, it stiffens the fabric so that it is almost paper-like, so now I can easily draw on it using the mechanical pencil without the fabric distorting. Now I can get perfectly straight, thin, highly accurate stitching lines! With starched fabric, no distortion! Comparison of marker lines vs mechanical pencil lines. Second, thanks to Lifeofglamour's various experiments with tinting starch for use on ruffs, I know that very often, pigments and dirt that are mixed in with or sitting on top of starch wash out without staining the fabric. When I tested this theory on my fabric, washing the starch out washed the pencil marks down the drain too! You can buy spray on starch or the liquid kind you dip your fabric into from the store, but thanks to Frolicking Frocks (dude, check out those petticoats!) I'm a convert to making my own out of cornstarch. My test stitching proves much more straight and accurate with the pencil guidelines, and after washing all evidence of the pencil lead is gone! Now that I've got that settled, the last step before stitching is to use a lightbox to trace my design onto the fabric. Stitching My original plan was to hand-stitch the stays, but I came to my senses after attempting a sample. I tried using my modern sewing machine, but it's very hard to stitch a line precisely 0.25" and stop in exactly the right place using the pedal control, so I pulled out the little Singer 99 hand crank machine I refurbished a few years ago instead. Remember this one? Isn't she pretty? With a hand crank, it's really easy to stop right at the exact number of stitches you want. A lot of fiddling and several tests later, I settled on a stitch length calibrated to precisely 1/16 of an inch, giving me squares that were 4 stitches wide on each side. Getting the correct stitch size is no mean feat on these old machines, since you set the length by screwing an unlabeled knob in or out as needed. That knob is the stitch length regulator. Notice the distinct lack of numbers or any useful markings of any sort? Now that I've got the length set, sewing each square is now as easy as starting the needle in the right place, sewing 4 stitches, sinking the needle on the 4th stitch, raising the presser foot, turning the fabric, putting the foot down again, sewing 4 more stitches, etc, all the way around the square. This leaves a bunch of thread tails all over the place. Of course I can't just trim them because the stitching would come out, so the loose threads are pulled to the back and tied off. Since I'm a bit paranoid about the knots coming undone, I put a dot of Fray-Check on each to prevent unraveling. Remember to test the Fray-Check on an inconspicuous spot first! My layers are thin, and on the first few knots I used too much and it soaked through to the front. Threads pulled to the back for tying. At first I was tying the threads after each square, but it's more efficient to sew several squares, then flip to the back and start pulling through/tying off. The problem with doing it that way is that those loose tails get in the way of stitching, and if you sew through the tail of a square a few rows down it's a mess to untangle. Luckily, I'm owned by two exceedingly furry felines, and thus have a clothing de-furring brush that doubles as a way to clear all my loose threads off to one side with a single swipe. Guess the fuzzbeasts are good for something. There's something like 200 tiny squares on just ONE front panel, plus more on each side panel, so you can see why this has been taking me a while! Cording After washing the starch out, drying, and pressing each piece, it's FINALLY time to stuff some cord in there. I'm using the same Sugar n' Cream cotton cord that I used in my corded petticoat. You'll want a cord of a width that fits fairly snugly in your channels, so choose accordingly, or stitch your channels to accommodate the cord you wish to use. I'm using a thick, blunt needle with a wide eye. Tapestry needles are perfect. The eye should be large enough that the cord just fits through it, but not so big that the needle won't fit through your channels with the now doubled cord in tow. I also have a pair needle nose pliers, because despite my best efforts, the eye of my needle still gets stuck in the fabric sometimes. When I made my last pair of corded stays, I broke the only good needle I had and swapped to one that was nearly the same, only sharp instead of blunt. It sorta worked, but the sharp tip kept shredding the fabric on both sides, and those scrapes later unraveled into larger holes, allowing the cord to poke out. I wouldn't have minded if they were all on the inside, but most of them were on the pretty outside! If all you can get is a sharp needle, grind the tip down. Holes in channels caused by sharp needle shredding fabric. Sadly, these are on the front, so they show when I wear it. On the backside of the stays, I poke the needle through just one layer of fabric right at the start of a channel. Since the needle is blunt, with some fabrics an awl is needed to start the hole. It takes a bit of practice to get the tip to go through just one layer of fabric, but practice makes perfect, right? Using an awl to start the hole. Threading the needle into the channel. Once inside, the needle is pushed down the length of the channel, dragging the cord behind it. It's tight, and I have to moosh (super technical term) and manipulate the fabric around the needle to move it along. Sometimes the pliers are necessary to pull the needle through the channel too. The eye is stuck at the entry to the channel, so I use pliers to help it along. At the opposite end, I poke the tip of the needle back out through the back fabric and pull it out, taking care to not pull all the cording out with it! The pliers are also super useful here, as the eye of the needle generally gets stuck on the way out. All the pushing and pulling on the needle is pretty rough on my fingers; using the pliers instead solves that problem. The downside is that I'm more likely to break a needle when pulling on it with the pliers. It's easier on my fingers to just use the pliers to pull the needle out. I don't trim the cord close to the fabric just yet; instead I cut it so there's about 1" still hanging out, then move on to the other channels. The places where the cords cross are a bit tricky to get through, but it's doable. Eventually I end up with a small forest of cord ends growing out of the back of the stays. Well that's a right mess. Once I've got a whole section done, I start trimming the stray tails. I cut the cord pretty close to the fabric, but not right flush with it. There are till some tiny tails hanging out. Trimmed close, with just a little bit hanging out. Then, without holding onto the cord, I tug on both ends of the channel, stretching the fabric slightly. Most of the tails pop back into their holes and disappear. A few are still sticking out a bit, but this is the inside of the garment, so I don't care overmuch. Gently stretching each channel. There are still holes at the start and end of each channel, but again, it's the inside, and they close up a little with time anyways. No more tails! Wow, that got lengthy! If any part of this tutorial isn't clear, let me know and I'll try to unmuddy it a bit. If you've got a cool cording project you're working on, show us in the comments! I've still got a few panels to go, so I'm off to the sewing table again for another late night.

Leer zelf Garens & Textiel Verven middels verschillende technieken! We geven je hier Tips, Tricks en Ideeën om zelf aan de slag te gaan ;)

There is no anxiety sewists dread more than the anxiety that comes when you are snipping away at your precious fabric. The saying "measure twice, cut once" is there for a reason. If you cut your fabric incorrectly, it can ruin a project and it can cost you a ton of money. That's why we have this quick guide on How to Cut Fabric. This resource is going to provide you with the basics of cutting fabric for sewing and more. Fabric is not cheap and if you do not know how to cut fabric properly, it can do some serious damage. It is even harder to learn how to pin and cut a pattern on the fabric. You have to cut your fabric to match your piece, ensure that your print is going the right way, and make sure that you cut the right side facing out. Stressed out yet? Don’t worry, sewists. That’s why we are here yet again to help you out. This sewing guide is going to give you the top 5 things you can do to cut fabric perfectly every single time. For more sewing inspiration, sign up for our e-newsletter!

Eco printing is magical, especially on protein fibres like wool. It takes colour and design well but there are few things to kepp in mind

We are obsessed with dyeing fabrics. Today we are delighted to partner with method in their #fearnomess campaign with a DIY Natural Fabric Dye tutorial.

Eco printing has so many questions since it is such an interesting art form. I'll share my Eco Printing Tips & tricks with you from my many experimentations

Need I remind you that fabrics can either make or break your project. Read on for more info on our guide to different fabrics and their properties.

Sewing your own dress gives you a creative freedom that you’ll never find in ready-to-wear clothing. You get to pick the style, choose a fabric that inspires you and tailor the fit for a completely custom look. Plus, our favorite dresses are the ones that fit well and make us feel proud of our…

Got a question about caring for a certain type of fabric? We got you! As many of you know, this year has been a big one for me in terms of looking at my carbon footprint. I’ve been more conscious about the things I’ve been buying, and also trying to look after the things I […] Read More

Crochet or knit with rag yarn made from fabric strips to upcycle worn clothing, thrift store finds, bed linens, and fabric remnants.

Save Do you sometimes get angry at your straight pins? You know, when you can’t wiggle them through that darn fabric? Yeah…..pins aren’t r

Ruching fabric is so easy and can be used in many ways, from gathering up the sides of a shirt to shortening sleeves. How to sew ruching.

Everyone's got that little trick up their sleeve that makes cooking so much easier.

Bibliography: p. 141-143

How to give fabric a vintage look with an easy and way technique. Transform new ordinary fabrics into vintage looking fabrics. Step by step tutorial.

Back in 2009 I heard about a new book published by a Swedish woman about limp case bindings. Being a fan of this style of historical binding, and always looking for new structures to learn and make, I ordered the book. This was the beginning of a wonderful relationship that has lasted from then until now (and hopefully will continue) with the author of that book, Monica Langwe. Limp Bindings from Tallin by Monica Langwe Her first book was called Limp Bindings from Tallin and as soon as I ordered it I received a very kind e-mail from her that she had viewed my website and liked my work. In 2010 I received an invitation from Monica to be a part of her second book, Limp Bindings from the Vatican Library. I was thrilled and, of course, accepted. Three years later that book is complete and in my hands and it is gorgeous! Limp Bindings from the Vatican Library by Monica Langwe First, a little bit more about Monica's first book: Limp Bindings from Tallin. While studying bookbinding Monica became aware of a style of binding that she believed was under represented in research and bookbinding history. This was limp case bindings. These are bindings that were made relatively quickly, with soft (limp) covers, often utilizing recycled materials, with the content being records, accounts, and notes. They were utilitarian and meant to be handled and used and added on to. The limp case was usually one piece of vellum, leather or paper sewn to the text block leaving the stitching exposed on the spine. These books possess an elegant simplicity with ingenious, unassuming details. Monica's research led her to the City Archives in Tallin, Estonia, where she chose 22 bindings to analyze. Out of those 22 she focused on 8 for her first book in which she describes each book, its content, its binding, and includes detailed drawings about how the book is put together. She does not provide "how-to" instruction but rather illustrates construction and sewing. Her approach is similar to J. A. Szirmai's The Archaeology of Medieval Bookbinding. At the end of the book is the Gallery where Monica asked 8 book artists to glean inspiration from the 8 limp case bindings from Tallin and interpret them in their own bindings. Beautiful work! Monica made special cases for those of use who contributed to the project Monica's second book, Limp Bindings from the Vatican Library, is similar in layout to her first book, but more. More of everything. Eleven bindings from the Vatican Library's collection were chosen to focus on. And, there are more illustrations and photographs. This is a gorgeous book and if you are at all interested in this style of binding you will want this book in your own library. Illustration from Limp Bindings from the Vatican Library Back in 2010, Monica asked me to be an artist contributor to the Gallery of her second book. This has been such a fun project to be a part of and I am honored to be in the presence of the other gallery book artists: Hedi Kyle, Peter Verheyen, Carmencho Arregui, Chela Metzger just to name a few! My instruction booklet from Monica and a gift! The Vatican Library book that I was asked to draw inspiration from was a book written by Sceopperus in latin that "tells about the highest Christian faculty - the Vatican - Institutionis Christianae Summa". It was written in 1568 and has a re-purposed cover that appears to be sheet music on vellum. Monica sent me a photo of the original, a model that she had made of the book, and a little drawing by her on how the stitching/binding was made. She always sends little gifts, too, this time an apron! Instructions from Monica on how the original book was sewn I practiced the binding a couple of times since the sewing tension was tricky. Then I began my book. My practice binding and template Since the original book, as well as many other limp case bindings, utilize re-purposed materials, I wanted to do the same. And, even go further and make that the focus and celebration of my book. My book "Reuse" that is in the Gallery section of Limp Bindings from the Vatican Library I didn't want to just make a blank book, but an artists' book. I collect old books, ledgers, library date slips and other paper ephemera so combined and stitched my found materials to create my content. Interior shot of "Reuse" For the cover, I used Cave Paper as my substrate (since many of my found papers would be too weak to hold up to a hinge)and covered it with pieces of a musical score and a ledger page from a general store in North Carolina. Like the original, I chose to create a wrap around cover. "Reuse" my book in Limp Bindings from the Vatican Library In 2011, I shipped my little book off to Sweden and now two years later Monica has shipped her completed book back to me. And, of course, in Monica style, with some little extras. My copy of the Vatican book arrived in this custom case with a thank you bookmark and blank journal made by Monica The book is beautiful and inspiring. I look forward to trying out some of the bindings. As part of the project Monica has organized three exhibits that include the gallery artists' books. My little book gets to travel to the following venues: Dalarnas Museum Falun 18 september - 13 oktober Svenska Institutet i Rom Instituto Svedese di Studi Classici a Roma 4 november - 8 november S:ta Eugenia katolska församling, Stockholm 18 november - 15:e december To purchase Monica's books please visit her website. "Thank you" bookmark from Monica Thank you Monica!

Learn how to determine the composition of your fabrics based on their characteristics and reactions to burn tests.

Crochet Basket - This is amazing work from the Finnish blog Nurin Kurin. More tips and tricks via the link. Google translate does a great job, but the pics are very useful as well.

Sometimes, you want to sew a garment but you can't find a pattern for it! Here are some tips to teach you how to sew without a pattern! Read on here!

Plain, classic, funny and simple. Modern cross stitch pattern is designed on 14 count Aida. It will run about 5x5 and will look awesome in a 5x7 frame. This pattern will come with 2 different sized full colour patterns, for printing or viewing convenience, and a handy little tips and tricks printout to help you in your quest for cross stitching awesomeness. THIS IS NOT A PHYSICAL PATTERN. THIS LISTING IS FOR A PDF FILE. It includes a computer rendering of the finished pattern, a full color pattern, and a key in DMC thread colors. It will be automatically available for download after purchase. The link to download is sent to the email Etsy has on file for you. If you ask me nicely, I can make changes to this pattern for you and create a custom listing, but really, you can just mess around with the colours when you are stitching, it would work just as well. Please don’t resell my patterns or stitch them for profit, I worked really hard on them. Well actually, I used my laptop on my couch while drinking wine and watching Game of Thrones, but you know what I mean.

Nothing makes a sweater more uncomfortable or sloppy looking than the wrong armhole depth. Today's Tuesday tip is how to measure armhole depth.

The basics of longarm quilting on a Handi Quilter Amara along with some tips and tricks for free motion and ruler work are discussed.
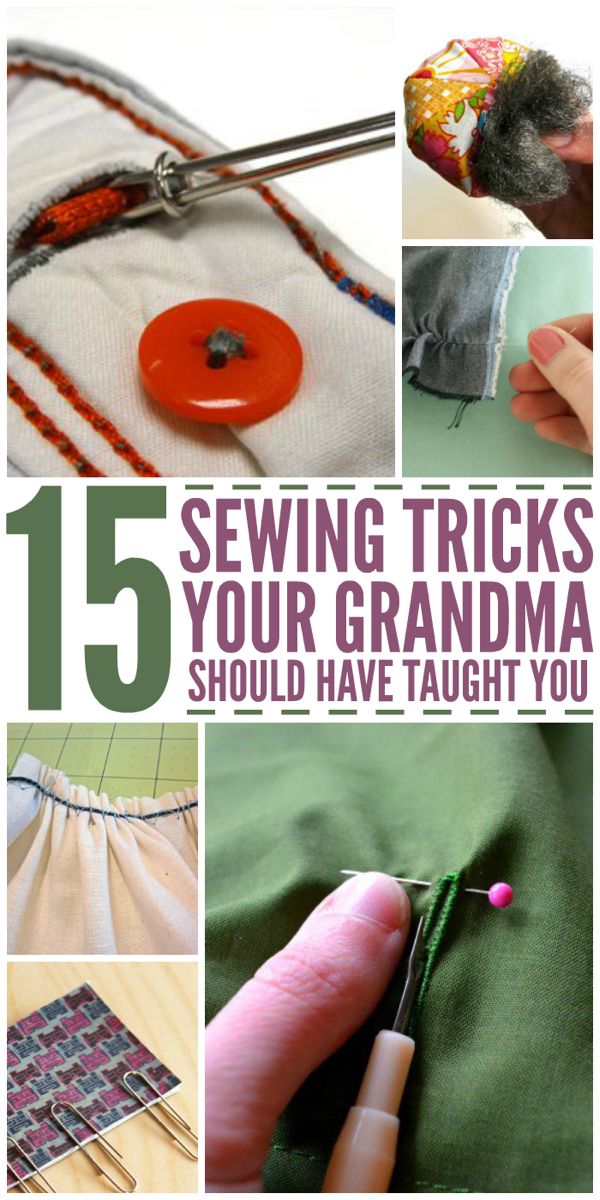
Whether you're an experienced sewist or a beginner just starting out, here are 15 sewing tips and tricks you need to have in your arsenal.

A bunch of unsightly wires can take away from even the most well-designed space. Fortunately, Stephanie Lynn from Under the Table and Dreaming can help you tame those cords in a mere five minutes with her no-sew fabric cord covers. Yes, you heard right – no- sew! Stephanie Lynn

Oggi rubo letteralmente un post da un altro blog, A pair and a spare, per condividere con voi una mini guida ai tessuti. Mi rendo conto che pochissime persone scelgono gli...

Length of video – 16.31 minutes Start of demo – 4.16 minutes Braiding on the Round Kumihimo Disk Even experienced braiders may find something of interest in this video because it is packed full of the tips and tricks which have worked for me time and time again, both on my own and in workshops […]

Here is a quick little growing guide for this great plant! Interested in more? Click HERE to learn about an in-person workshop happening in Minnesota April 27th! Japanese Indigo (Persicaria tinctoria) – Click for seeds! A member of the knotweed family, this easy to grow annual plant has long been a part of Japanese cultureContinue reading "Growing Japanese Indigo"

I had several people e-mail me and ask about pin stitching after reading my last journal entry , so I decided to create a tutorial and show...

Did you know that your clothes impact your health and the planet? Here's a sustainable fabrics list to help you make better shopping decisions

Reference Article: Facts about Mesopotamia.

Sewing tricks from professional seamstresses. Your sewing is about to get easier and more efficient. Grab a project to test them out!
