


Last year, I cleaned out and got rid of most of my fabric stash. (Read about that here). I didn't touch my scraps though. I can't bring myself to get rid of them because someday I'll make a postage stamp quilt or a string quilt or a scrappy something! (Maybe I'll design a quilt meant to use scraps...hmm...) In the ba

10 creative and unique ways to store fabric! #storage #organizing #fabricstorage #sewing #fabric #organize

I think it’s safe to say that we, as crafters, have a tendency to “collect” supplies that we love. Our obsessions may vary, but I’m willing to bet there is an overabundance of something in your crafting area! So this month we’re focusing on destashing our craft space, one product at a time. For me ... Read More about Paper Crafts Stash Busters

My finished knit shirt had too low of a neckline and the armpits showed too much. This is how I fixed both problems.

Book review of Stylish Remakes by Violette Room (Tuttle Publishing), refashion project and book giveaway - csews.com

DIY et Tuto Couture Pour Petits et Grands ! Patrons Gratuits et Pas à Pas Détaillés Pour des Créations Uniques et Originales !


Would you like to know how to sew an invisible zipper fast and simple? Are you intimidated by sewing the invisible zipper? Let me show you the fastest and easiest way to insert an invisible zip that eliminates the need for pins and basting. You don’t need to fumble with pins, baste the zipper or press the zipper teeth flat before starting. This technique will help you to eliminate common problems and get professional results that you will be proud to show off.

Huge list of sew and no sew projects for fabric scraps. Make gifts, jewelery or home decor items out of the trimmings, crumbs and other items you would normally toss in the scrap bin.
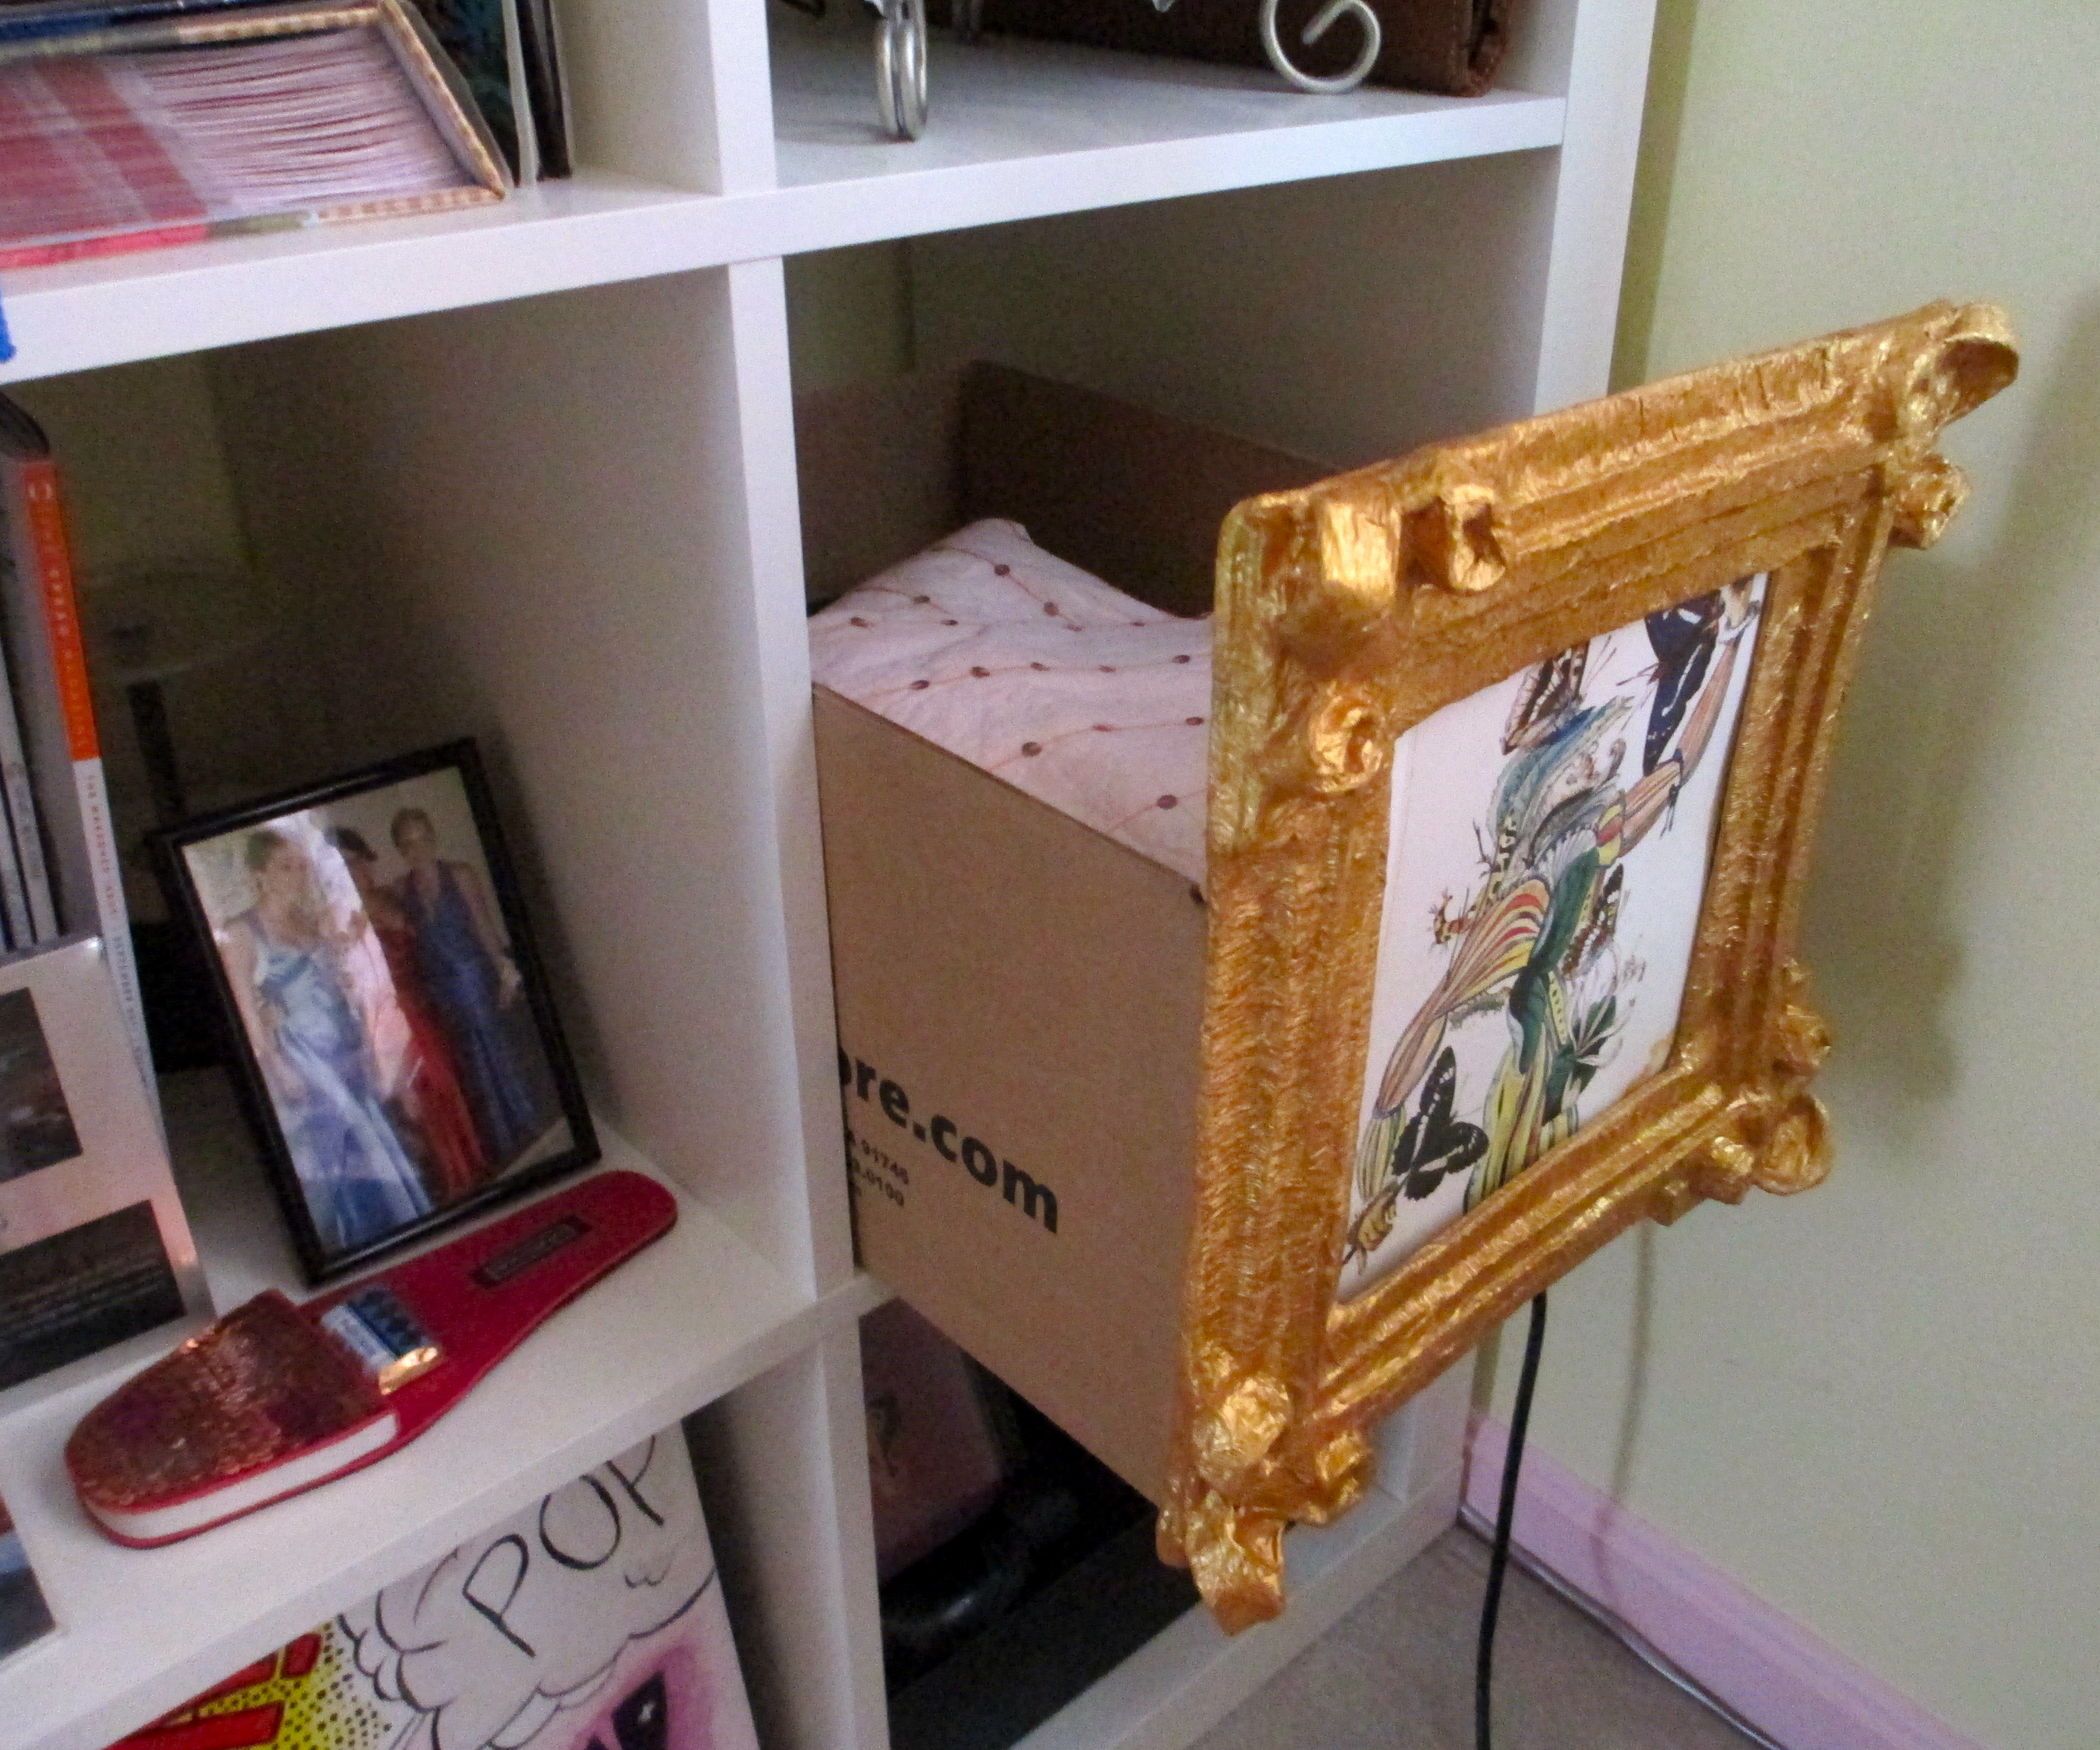
Cardboard Box Storage Frame: Recycle a cardboard box and some newspaper into a storage device. This is the cheapest way to make your clutter vanish behind a classy decoy picture frame ideal for your book shelves, cubbies, and pretty much any ledge. Supplies: cardboard box p…

How to make a sewing pattern bigger or smaller - sewing pattern grading - make a sewing pattern a different size

Love collecting driftwood for crafting and decor? Learn how to properly clean and disinfect driftwood for safe indoor use.

Need to wrap a wedding gift? Watch these fun video tutorials from Hallmark to learn how to wrap wedding gifts that wow.

I recently set out to tackle an upholstery project on a very limited budget. It was for a kids’ bedroom so I wanted something a little special but fabric can be cha-ching....

In this video sewing tutorial I will show you how to sew a buttonhole by hand. Find out why you would need to make hand-sewn buttonholes, how to do a knotted buttonhole stitch, what threads to use for making buttonholes by hand.

Using Mod Podge and some Tape Measure graphics I gave an old table a new Tape Measure Side Table look. Sharing a full tutorial.

Learn how to make paper claws in less than 5 minutes! Or download and print our free template to make things really easy! These paper claws are a little bit scary, and a whole lot of fun. Use basic origami folds to transform 1 piece of regular printer paper into a menacing paper claw! These paper wolf claws are great for pretend play and are the perfect addition to a Halloween costume. This post contains affiliate links. If you use these links to buy something we may earn a small commission which helps us run this website. How to Make Paper

Crafting with newspaper goes beyond making papier mache and collages. Learn how to make wall decor, lamps, and clothing, all from newspaper!

Change up your art supply list to include aluminum foil with this colorful foil art for kids idea!

In this National Sewing Circle article, check out these five great ways to organize and store all of your sewing supplies.

Has this ever happened to you where a quilty friend shares a link to a really cool technique and you "think" you've committed it to memory until you didn't? Yep, that's exactly what happened in this situation. I "thought" I had the technique all locked down in my memory and I was in my sewing room making a block when my block did NOT look like the block I had remembered. What happened?!!! Preface it to say, "my mistake" turned out to be better than the original!! Why? Because "my way" requires NO TRIMMING when the block is all done. How's that! NO CUTTING and NO TRIMMING - whose interested now?!! Let me show you "my way" in creating the NO CUT - NO TRIM Block-in-a-Block Quilt. Grab (1) EACH of your favorite 5" and 10" Stackers. I used my NEW Midnight Garden Stackers available here! Press BOTH the 5" and 10" squares in half vertically AND horizontally with a hot iron to create the crease. Place the 5" PRESSED square (right side up) on top of a 10" PRESSED square (right side up) aligning the pressed lines so the 5" square is centered on the 10" square. Using the cardboard stock found in your 10" Stacker pack, lay it on top of the layered fabrics so the edge of the cardboard lines up with the edge of the 5" square. Using a hot iron, press the fabric onto the cardboard stock, slide the cardboard stock out and pin. Repeat the SAME steps on the other side. Sew a 1/4" from each edge. Press open. Rotate your block and REPEAT the exact steps above to the other two sides. To create a NO CUT - NO TRIM Block-in-a-Block finishing 9" square! Lay your blocks out in a pleasing fashion of 6 blocks across x 7 blocks down. Sew the rows together, quilt, bind and DONE!!! Isn't she so pretty?! The perfect lap size coming in at 51" x 59"! And perfect to make EASILY in a weekend or ONE dedicated day to quilting! Whose RUNNING to their sewing room and grabbing their favorite 5" and 10" Stackers to make their very own NO CUT - NO TRIM Block-in-a-Block quilt? I see quite a few hands raised. You're Welcome! Happy NO CUT - NO TRIM Quilting! Gerri
