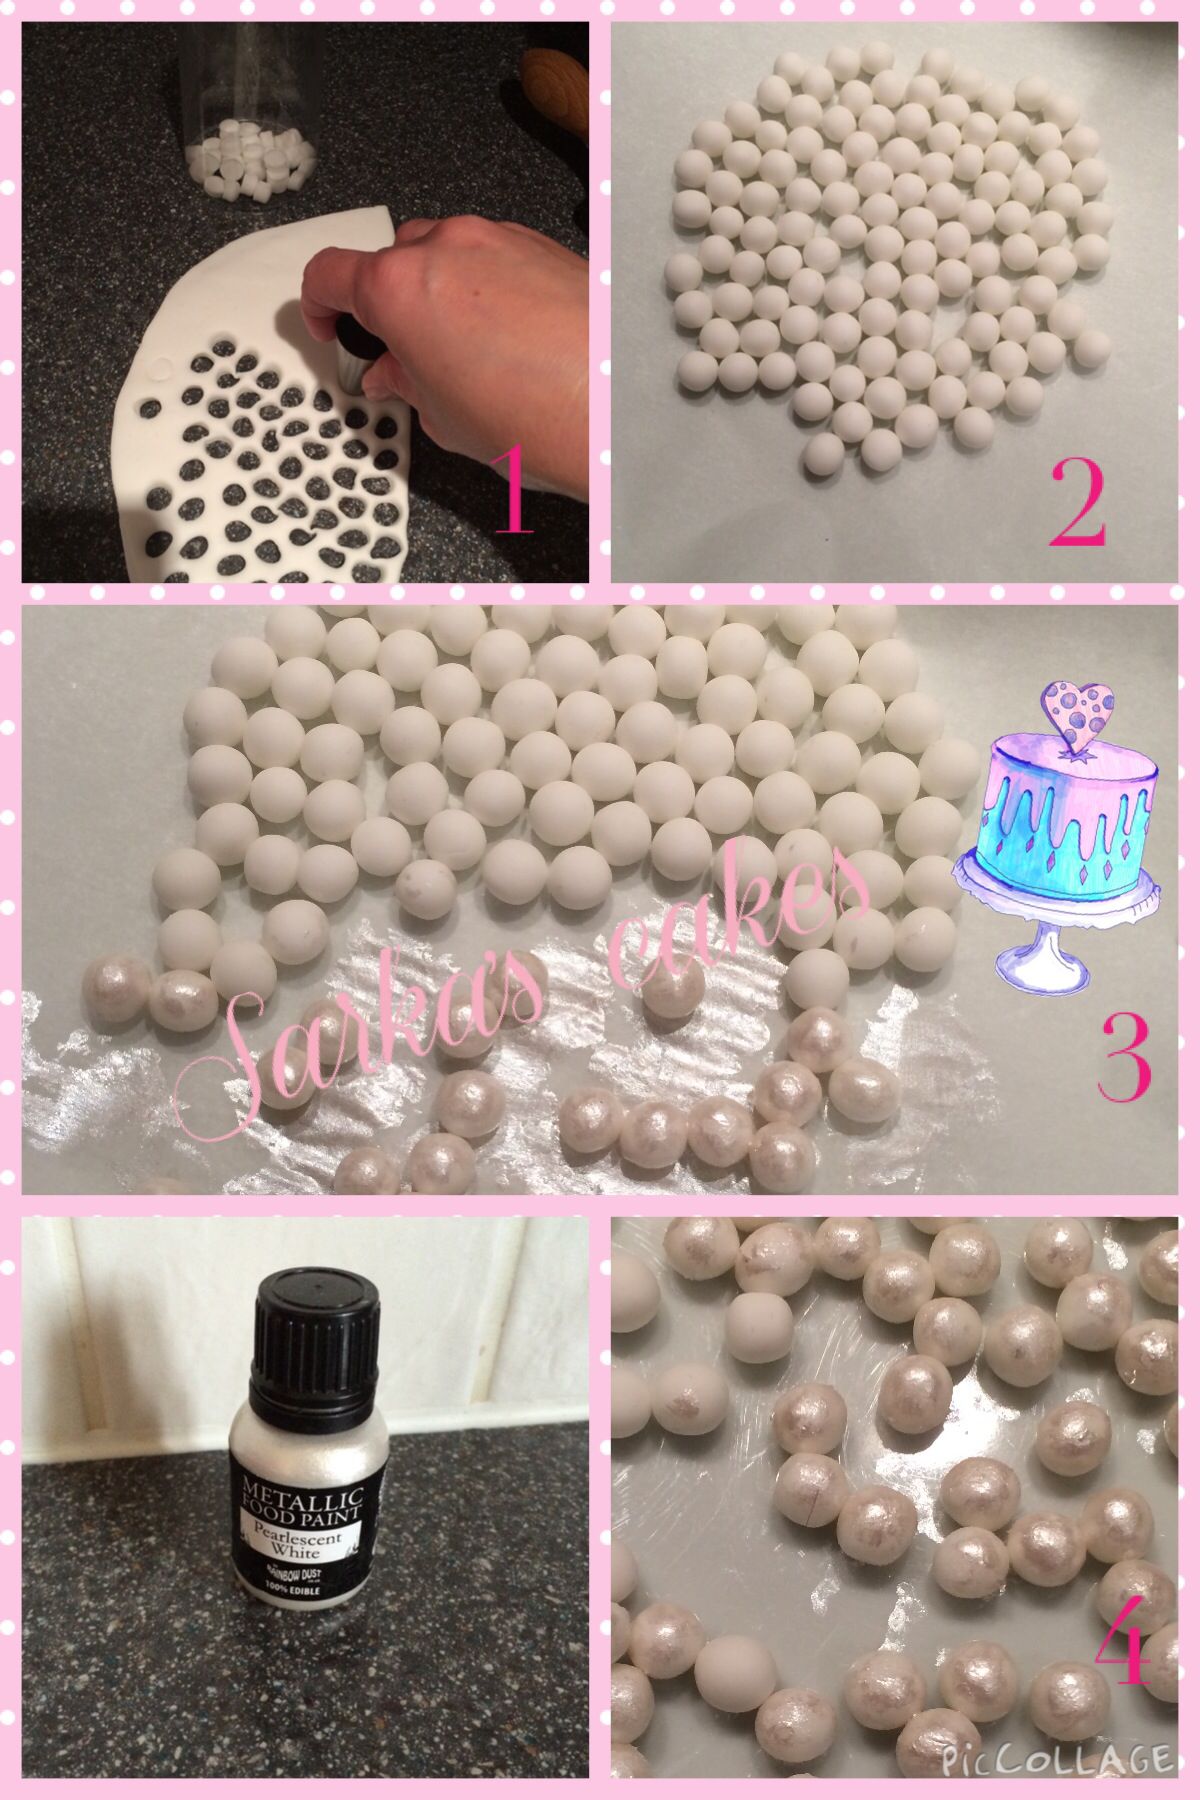
I like to make "cookie bling" or jewelry icing transfers throughout the year whenever I have some spare time and leftover icing. With the hectic getting-ready-for-the-holidays hubbub coming up fast it's important for me, sanity wise, to have as much advance preparation done as possible. They're not very hard to make, but they can be time consuming, which is why I make them as time permits throughout the year. One more thing, a good pair of off set or angled tweezers make this go so much better. These little gems are called dragees, and depending on where you live they can be very hard if not impossible to find. I won't go into all the reasons here, but because I live in California I'll refer to them as non edible decorations and hopefully avoid be hauled off in cookie cuffs to culinary jail. I horde have various colors and sizes of these to make jewelry bling for my cookies. And because I make them as a transfer and only adhere them to the cookie with a dab of icing they're easy enough to take off before actually eating the cookie. Shown here are some sugar pearls and small mint candies that I use to make my cookie jewels as well. The bottom row is how these happen to look right out of the container. The top row shows how they look after I shake them around in pearl dust. Some brands come already pearlized (I'm going to say that's a word even though spell check is telling me it's not). The larger candies on the right are Wilton mints used for making wedding favors. Wilton multi colored candies are on the bottom left, followed by black then pink sugar pearls. Again the top row shows them after a shake in pearl dust. Some brands of sugar pearls or candy don't seem to take too well to the dusting process, so I do a test run first. Also if they're handled too much the pearl dust can rub off on your fingers, so I like to use tweezers when putting together the jewels. To make this jewel design I start by placing a drop of royal icing on a piece of waxed paper taped over a grid pattern. The grid helps me make sure I have enough room to work, by keeping them spaced apart so I won't run into the previous design and destroy all my hard work. I set a dragee into the dot of icing letting some squish out a bit. The offset tweezers let me place them easily. Into the excess icing I'm placing 4 tiny dragees in a square pattern around the center. Adding more icing I place sugar pearls in between the tiny dragees. (Top of the photo) The lower jewel in the photo is a finished one that still needs to dry. Notice that I place just enough icing to adhere the sugar pearl I'm currently placing to the others, but not so much that it spreads out. I think it gives it a more realistic "jewelry" look. At the top of this photo is the beginning of another design. It starts out the same way, only this time the tiny dragees will go all the way around the center sugar pearl. You can stop at this point for a small jewel, but I'm going to add another circle of pearls. Adding more icing as needed I surround the tiny dragees with more sugar pearls. And that finishes up that design. This next design is one of my favorites. You start the same way as with the two lower left jewels in the photo. The next step is to place a drop of icing above each tiny dragee and add a sugar pearl. I'm adding one in this photo. I'm adding the third one here. Remember to add drops of icing as needed so each bead will adhere to the ones next to it and the whole thing will hold together when dry. This is the last pearl for this design. These all will need to dry for least 12 - 24 hours or more depending on humidity. These are just a few of the easier multi use design shapes I use over and over. They can be easily altered by changing the color and the size of the pearls and dragees. Using black icing instead of white will give the jewels a more dramatic look. In the past I've added these jewels to molded fondant shapes, as well as placing them as accents for added bling and sparkle to jazz up what could be just a plain cookie. Note: The dragees will discolor or tarnish over time if left out in the open, so if you are making these up for future use, keep them in an airtight container once they dry. I actually pipe one design over and over until I have a sheet of them, then leave the finished and dried jewelry on the waxed paper. I place the whole sheet in a plastic "zipper" type baggie and store these stacked between a layer of bubble wrap and place them in an airtight container. When I need them I just peel them off the waxed paper and "glue" them to my cookies with a dab of icing. ♥ Happy Decorating ♥